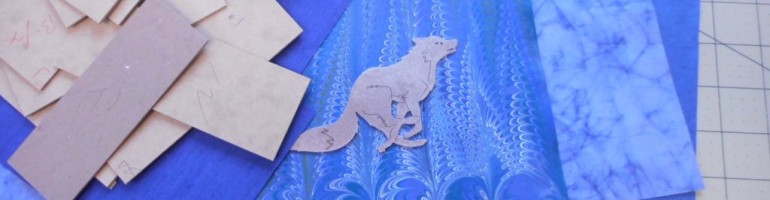
About a month ago I was working with Sam Castner on his Etsy page and found that we couldn’t list his stainless steel fox ring because there had been a glitch in production. These foxes and Sam’s other candle holders are part of his design for a spectacular set of gates for the Fox Run Vineyards as seen on his FaceBook page. This is the steel version of the fox ring.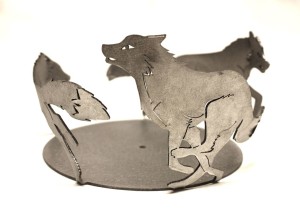 I asked Sam what he was going to do with the unusable rings and he wasn’t sure. Three days later I suddenly realized that the foxes were just the right size for some of my boxes and books, so I asked Sam if he were willing to snip some off and let me play with them. He did and this is the rest of the story.
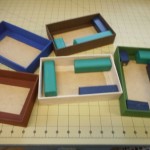
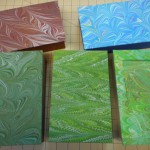
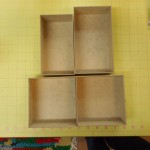
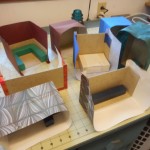
I started with some lidded boxes. These boxes are constructed in two parts, a bottom tray and a top. The top has a plinth attached that fits exactly into the mouth of the bottom tray. It’s a faster and easier construction than the clamshell preservation box. I had made the five bottoms before I started taking photos, but that process is straightforward and is just like the clamshell bottom tray shown in the second group of photos.
-
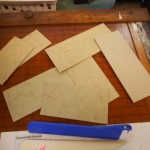
- Lidded Box Bottoms
-
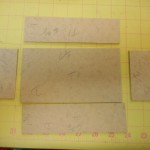
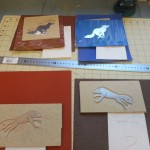
- Paper for tops
-
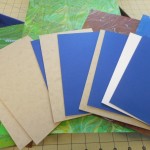
- Boards for tops & plinths
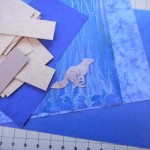
-
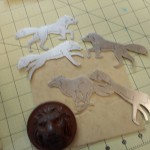
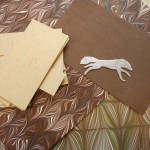
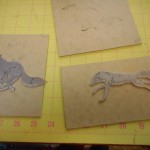
- Foxes and lion
-
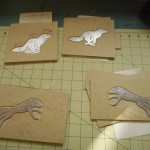
- Ready to carve out tops
-
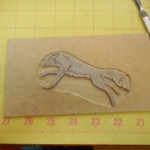
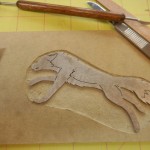
- Depression carved out for fox
-
- Tops covered
-
- Inserts adhered to tops
-
- Finished box
-
- Finished box
-
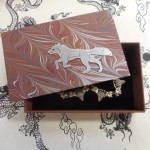
- Finished box
-
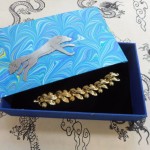
- Finished box
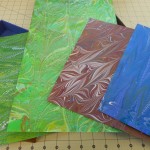
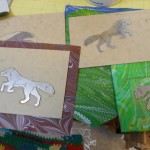
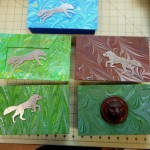
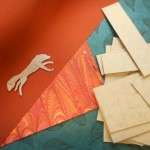
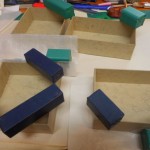
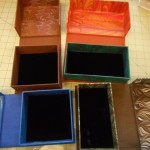
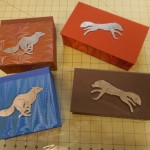
Design work is always fun and I tried to find pieces of my marbled paper that felt a bit like fox habitat, had lines that would flow with the shape of the fox and colors that showed off the stainless steel. After choosing the materials, I decided to make all these boxes the same size, which I rarely do, but it does make cutting easier. I don’t like things that are just stuck on the top of boxes, so I carved down into the binders’ board to recess the fox pieces. They aren’t quite flush with the top, but rest about half way in. The exception is the light green box where I made a frame the same thickness as the fox. I tried different shapes for the insert and found it didn’t matter much since there was so much pattern in the paper under the fox. The wooden lion was added in, as it was something I had been meaning to try for a while. Seemed like a good time. The plinths under the tops were covered with a variety of decorative papers that complimented the marbled paper and the bottom trays were lined with black velvet.
I was pleased enough with these results to move on and make some clamshell boxes. The design is based on the preservation box used by archives, rare book libraries and museums. When I was working as an archivist, I made hundreds of these, not as artistic and not nearly as much fun!
First step is always design – choosing size, shape, colors, and materials. I never make it through in one go! This time it was the dark brown bookcloth. It was perfect, until I discovered that I was down to my last piece and it was an inch too short for the box I wanted! This was an easier problem to solve than when it’s my marbled paper that is in short supply. Bookcloth can be ordered, my paper can’t be reproduced, even by me!
-
- All the pieces for one box.
-
- All the pieces for one box.
-
- All the pieces for one box.
-

- All the pieces for one box.
-
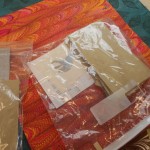
- I try to keep all the pieces together in zipper bags.
-
- Pieces for bottom box
-
- Slight mismeaurement
-
- Gluing the trays
-
- Finished trays
-
- Top and bottom trays, nested
-
- Top and bottom trays, nested
-
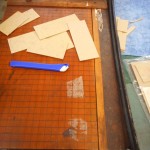
- Re-cutting boards
-
- Old cutter
-
- Covering the trays with bookcloth or paper
-
- Covering the trays with bookcloth or paper
-
- Laying out the cases
-
- Positioning the foxes
-
- Checking depth of cutout
-
- Fitting the inserts
-
- Fox in cutout area
-
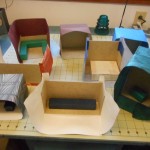
- Finished boxes
-
- Finished clamshell boxes
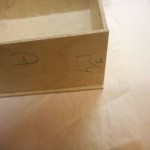
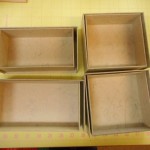
There are three separate components in a clamshell box: the inner or bottom tray, the outer or top tray and the case. When making a box for a specific item, the inner box must exactly fit the item. I didn’t make these boxes for any specific measure. The square boxes are almost the same size, but because I misread some numbers, the two long boxes are different sizes. The inner box is made first, then the outer box and finally, the case. The case is constructed just like the covers of a book with two boards joined together with a spine strip. The inner tray is mounted on the inside of one cover and the outer tray on the other. I have to be careful that they are aligned correctly and the outer tray fits snugly right over the inner tray.
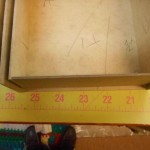
No matter how carefully I cut, there are always some pieces of board that aren’t quite right. Sometimes they are too short or too long, but most frequently, they are not exactly square. At least that used to be the problem. I have three cutters that I use all the time: one I use to cut the big sheets of Davey board into manageable size, the new fancy one is for most of the paper, especially when I need 30 or 40 sheets cut the same size, and the last is an ancient Milton Bradley school cutter that I use for small to medium pieces of board. I have known the Milton Bradley since the early 1950s and I’m pretty sure it’s at least ten years older than that. I was about to get rid of it when I realized it was the only cutter I had that could cut board exactly square and it was especially good on board that was under two inches wide. So three cutters and I need them all!
After making and covering the trays, I move on to the case. When I am using an insert, the first thing is to decide on how it will be mounted. With these boxes, I cut down about half the thickness of the board and excavated an area for the fox. The case is then covered with bookcloth or paper and the trays attached to the inside. The final steps are mounting the fox on the top cover and lining the bottom tray with black velvet.
My fox boxes will be available in my Etsy shop and at ACYC very soon.
You can read more about Sam Castner’s metalworking and the future gates for the Fox Run Vineyards on his FaceBook page.
Direct link to Etsy shop
I’ve been away from my creative side for the summer. Your blog is causing a strong desire to get back to it! Lovely stuff! THanks for sharing!
Susan
Thanks! I hate it when it’s just too much trouble to set up all the marbling stuff. I feel that way most of the summer, but by fall I’m raring to go. Most of the work I’ve done this summer has been driven by deadlines and I hate working that way.
What’s the point of being retired if I can’t relax and enjoy? Hope you can get back to creating soon. It’s the best.
Nancy