Boxes and Towers
Once I really got into marbling paper, I quickly arrived at the point where I had many more sheets than I could possibly use for my books.
I first started making note cards, but that meant marbling on card stock, which isn’t appropriate for books. So instead of reducing the amount of paper I had, I was creating more!
Several years ago, I took a course at the John C. Campbell Folk School in which we had made boxes from paste papers. For Valentine’s Day the following year, I made everyone in my family boxes filled with candies. That was the extent of my box making until a friend saw one in my studio and I gave it to her. She immediately asked me to make some for her grandchildren in their favorite colors. She filled them with jewelry and goodies for presents. Thus was born the Treasure Tower.

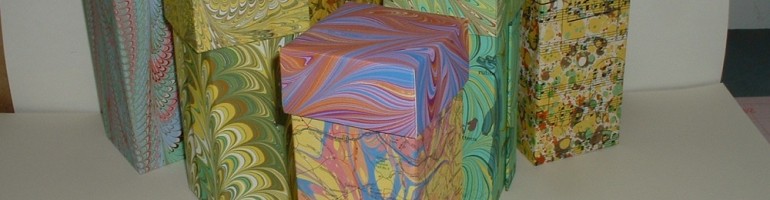
I love the challenge of putting three or four different papers together. Because marbled papers are so individual, this can be very hard. Colors from one marbling session frequently don’t match the same colors from a different time. My penchant for using colored papers doesn’t help as it radically changes colors. I have been using a lot of vintage papers and founds papers like menus and maps in my towers just because they are fun.
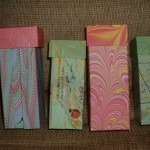
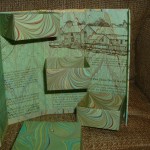
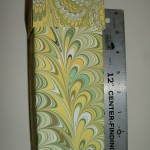


Folded, the boxes are between 5″ and 7″ tall and approximately 3″ square. Open, the tower reveals three small trays, just right for holding small jewelry, candies or light-weight office supplies.
More on Making Towers
Pingback: Towers are Fun | Losing Her Marbles
Pingback: Finished Towers | Losing Her Marbles
very interested in the proposed class at John C. Campbell school in the fall, please detail program for me. thank you in advance….Myra
Myra,
Thanks for checking out my blog. I was just a student at the Folk School, not an instructor. For more information on this year’s courses, check out their new catalog at Folkschool.org It’s a great place to learn, relax and enjoy!
If you have any questions about the participant experience, I’d be happy to share.
Nancy
Hello Nancy,
I just discovered your blog in my search for ideas, inspiration and, what got me here now: problem solving in marbling! Your blog is a wonderful source of information and I have already spent a great deal of time here, and will soon be devouring every page.
This one particular item, your Treasure Towers, is something I would love to make for myself, yet have no experience in box crafting. Have you posted any details on how to make these beautiful boxes and I just didn’t see it? Is there an online source I could refer to?
thank you so much!
Best,
Marta
Marta,
Thanks so much for your kind words.
I learned how to make the towers in a class and modified them in size. I started, but never finished writing down the instructions. I can give you a brief outline. The inside trays and the top are folded origami boxes. You can find instructions for lots of different styles in origami books or on the web. I used a square paper to produce a square box. The outside piece is made of one long piece of marbled paper, five pieces of mat board (you can use any stiff board, even binders board, but do NOT use corrugated cardboard) and one shorter piece of paper for the inside. All measurements start from the size of the inside trays. Add about 1/16″ to 1/8″ and that becomes the width of the panels. Four panels are the same width and the last is 1/3 to 1/2 the width of the others. The panels can be any height. Mine were 5″ to 7″, depending on what I was planning to do with them as well as the size of my paper. Lay out the panels with about 1/4″ between them, add 3/4″ on all sides and that is the size of the outer paper.
After the paper is glued out, the panels put in place, and the edges folded inside and glued down, the inside paper can be measured from just inside each corner, cut and glued on. The trays are then glued onto the covered panels. The bottom tray forms the bottom of the whole tower so must be carefully placed. The top tray should be 1/8″ to 1/4″ down from the top of its panel and the last tray is somewhere in the middle. Only the three middle panels have boxes, one on each panel. The weakest part of the construction is the attachment of the trays to the panels, so use a strong adhesive (I use PVA) and dry under weight. The top origami box is the last piece to be made. It has to be slightly larger than the trays, but not so large that it doesn’t hold the whole construction together. After many mistakes, I found the best way to get the correct fit was to fold several sizes out of scrap paper to use as testers and cut the final paper only after checking the size with your finished tower!
I hope these instructions make some sense. Good luck and ask questions if you need more help.
Nancy