Week before last I was back at the John Campbell Folk School for yet another book class. I usually try not to travel in February because of the weather, especially since I have to go through the mountains of Pennsylvania and West Virginia before I get to the snow-free areas. This year was special. When the temperature hit 50* in February and I still hadn’t had to have my driveway plowed, I started giving the trip serious consideration. I obsessed over the long-range forecasts and when they showed clear days on both weekends that I would be on the road, I called the School and signed up. Very glad I did. It was a great class and just the break I needed.
The class was Book Restoration taught by Gian Frontini, a master in book restoration. I have a few books that are valuable enough that I’ve been reluctant to attempt repairs without expert guidance and this was my opportunity. Since it was a very last minute decision, I just piled lots of wounded books, a heap of bookbinding supplies and my tools in the car and took off. Fortunately, my gamble paid off and it was a clear, easy drive in both directions.
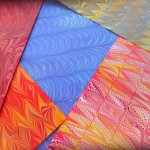
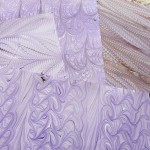
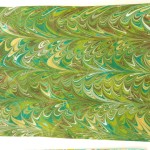
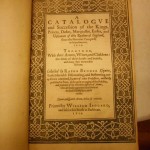
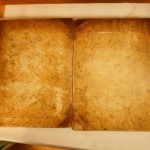
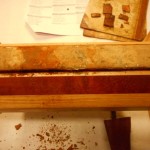
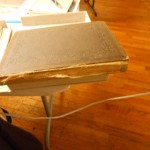
The three books I wanted to concentrate on had similar structural problems with detached covers and some minor damage to the spine. In all of them, the sewing was sound. The first was a book of heraldry printed in 1619. As with most paper from that era, it was in good shape. 17th century paper was made mostly from linen rags and so is much better quality than later paper which included other fibers, and eventually wood pulp. Here’s a visual look at the process.
-
-
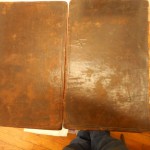
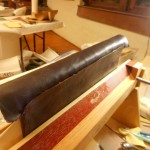
Detached board
-
-
Front and back covers
-
-
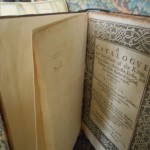
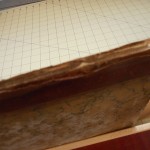
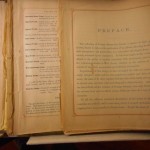
Title Page
-
-
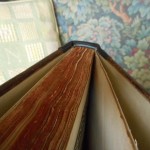
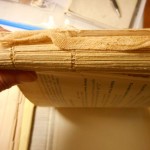
Original spine
-
-
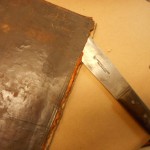
Removing spine
-
-
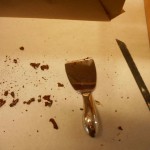
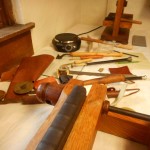
Tools
-
-
Opening space for new spine
-

-
Rebuilt spines
-
-
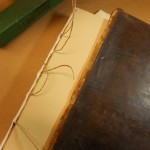
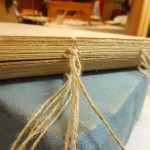
New cords ready to fit
-
-
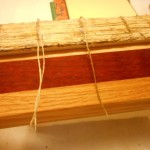
New cords, exterior
-
-
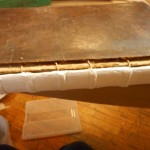
Adding muslin and backing book
-
-
New cords, interior
-
-
Fraying cords
-
-
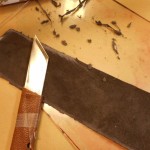
Paring new spine
-
-
Attaching new spine
-
-
Tooling spine
-
-
New endpapers
-
-
New endbands
-
-
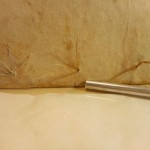
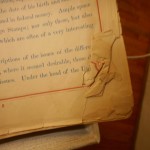
Original boards had holes for clasps
-
-
Finished restoration
-
-
Finished restoration
-

-
Finished restoration
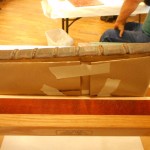
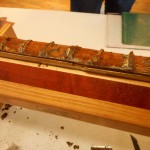
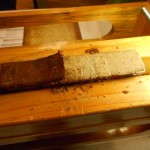
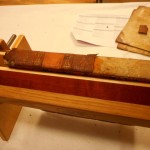
A restoration like this is painstaking work, but the results are really worth the time and effort. The first step was taking the old leather spine off of the book. In this case there was no reason for saving any of it and I was unable to lift any large pieces anyway. Once I was down to the paper of the textblock, rebuilding could begin. Multiple layers of thin tissue paper were glued onto the spine. Then, in a move reminiscent of Paul Newman digging the hole in “Cool Hand Luke”, the tissue was sanded off until the spine became smooth. Heavy threads were sewn through the textblock and twisted into new cords. Muslin was added to the spine with extra “wings” to add strength to the new hinges. Once the textblock was ready, the old boards had to be opened along the spine edge to receive the new leather spine. This was probably my most difficult part. The leather is fragile – after all it is 400 years old – and must be carefully lifted from the old board for a width sufficient to hold the new spine. Careful, tedious work. Not my forte! The new leather was pared and carefully inserted between the old leather and the old board, the endcaps were turned in and it started to look like a book again. Last step was to add the endpapers, paste them down and put the book into the press. As a small finishing touch, I added a tiny bit of tooling to the spine, just an outline next to the cords.
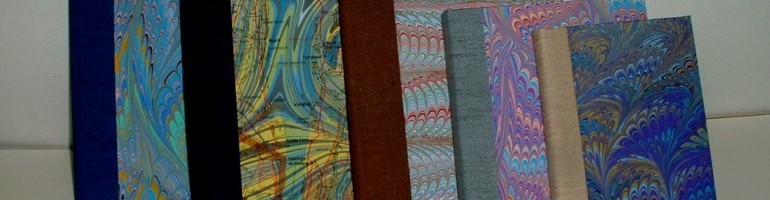
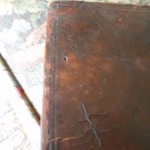
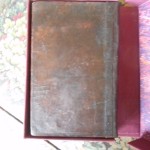
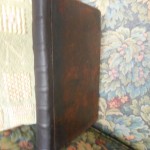
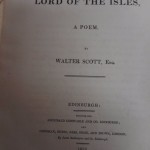
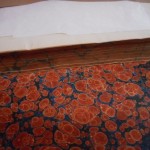
Next book up was an early 19th century copy of Scott’s “Lord of the Isles”. This book has a half-calf binding with leather on the spine and corners and a marbled paper cover, very similar in appearance to a lot of the blank books I make. There are problems and solutions similar to the Brooke, but with some twists.
-
-
Title Page
-
-
Detached covers
-
-
Endpapers & fore edge marbled to match
-
-
Trying to lift the spine
-
-
Some success
-
-
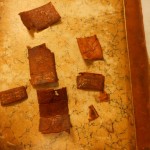
Spine gone
-
-
Largest bits and pieces
-
-
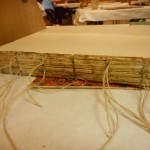
Threads sewn into textblock to make new cords
-
-
Twisting the new cords
-
-
Spine covered with tissue and sanded
-
-
Lifting leather and endpapers
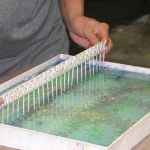
This book has marbled endpapers with matching marbling on the edges of the textblock. Unlike the Brooke book, I wanted to preserve the endpapers, which meant I had to ease the paper off of the edges of the boards and lift it just a bit at the spine edge. The paper was pretty sturdy, but I still managed to tear it in a few places. On the other hand, the leather was very fragile, much more so than on the Brooke which was 200 years older. The spine on this book had some decorative elements that I would have liked to have saved for the new spine, but they are so crumbly, I’m not sure I can use them at all. The textblock is almost finished, just have to add muslin. I have to cut and pare the leather for the new spine and attach it. The last step will be to fiddle with the endpapers so they appear to be one piece again. Not too sure about that step. I may have to ask for help on that.
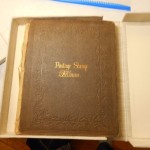
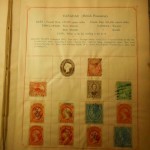
The last of the priority books was a stamp album that belonged to my Great-grandfather when he was a boy. Unlike the other books, this book is covered with cloth rather than leather. The book’s structure is also different. The first two are flexible bindings where the textblock was sewn directly onto the boards. The album is a cased binding, which means the covers and the textblock were made separately and then married together.
-
-
Front Cover
-
-
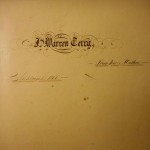
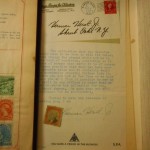
Inscription from G-G-Grandmother
-
-
Loose pages in front of book
-
-
Crumpled corner
-
-
Sample page
-
-
Letter to my Grandfather
-
-
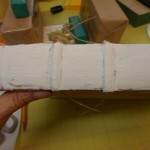
Spine before cleaning
-
-
Spine
-

-
Detached spine label
-
-
New cords
-
-
Spine getting tissue treatment
Unlike the other books, I had to make repairs on the textblock before I could start working on the structure. First thing was to create an extra section from the loose front pages. I could have just tipped them in, but since there were six loose pages, it was stronger to join sets of pages with Japanese paper and fold them into a small section that I could sew into the textblock. At the same time, I repaired some edges, tears and gently unfolded the crumpled corner. Once the pages were in shape, new cords were made in the same way as the previous books. I was able to line and sand the spine, but that was as far as I went with that project. I now need to create a new spine with bookcloth, attach it to the old boards, add a hollow tube to the textblock and case in the book. It shouldn’t take more than half a day to finish this book.
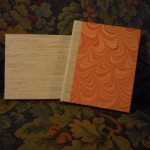
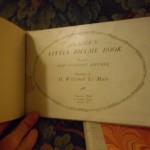
In some odd minutes I had, I also bound two small books I had had as a child that had lost all vestiges of covers.
-
-
Two small books
-
-
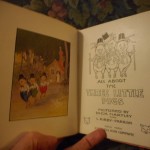
Three Little Pigs
-
-
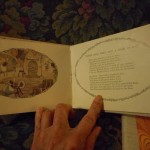
Nursery Rhymes
-
-
Nursery Rhymes
As I said, very productive and instructive week. Learned some new techniques and am becoming more confident in the old ones.
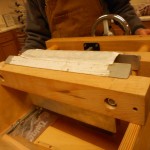
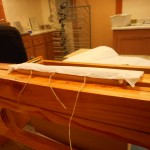
The book cradle I am using in the photos was purchased from Jim Poelstra at http://affordablebindingequipment.com/ and I love it!
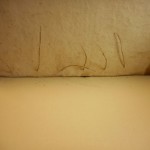
Oh, and as to the three Nancys … Yes, there were five women in the class and three were named Nancy!
Like this:
Like Loading...