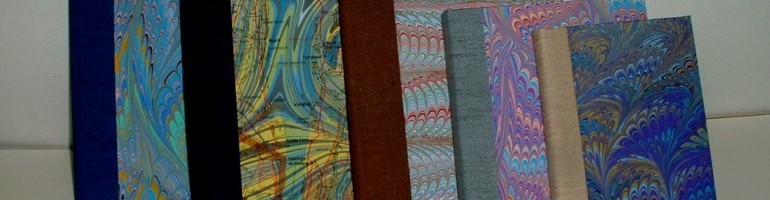
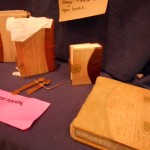
These books have it all!
Just finished a great week at the John C. Campbell Folk School creating a book sewn over double cords, laced onto wooden boards with a metal clasp. It was very intensive work as we used only hand tools and I’m not very skilled in either woodwork or metal crafting. Our instructor, Jim Croft, and his assistant, Brien Beidler, guided the class with great skill and wonderful patience.
As usual, I forgot to take my camera the first day and didn’t completely document some of the processes. I hope there are enough pictures that you can follow along on the path from raw materials to finished book. The first day was spent folding, sewing, and finishing the textblock; choosing wood for the boards and designing the book. My textblock had very little swell, so I decided to use a Romanesque/Carolingian structure which has a flat spine rather than the Gothic style (round spine) used by most of the rest of the class. Since this was a structure I had never made before, I was glad it turned out that way.
-

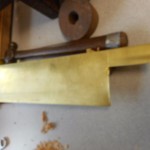
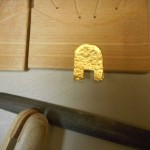
- Sample Romanesque binding by Jim Croft
-
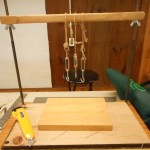
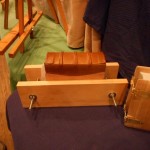
- Sewing Frame used for sewing the cords
-
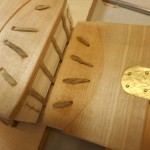
- Results of first day
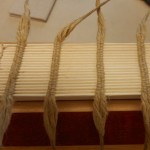
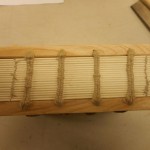
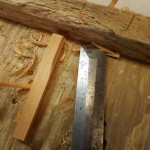
The textblock is Strathmore drawing paper which was sewn over double cords with a hand-spun linen thread. The ends of the cords were then thinned, coated with wheat paste and twisted together into points. This made it easy to lace and unlace the boards from the cords multiple times during the construction of the book.
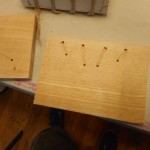
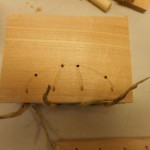
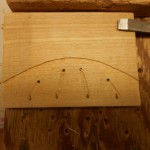
Unfortunately, I don’t have any pictures of either shaping the boards or drilling holes, but you can see the results. With a Romanesque binding the cords are laced directly into the spine edge of the boards. The hole is drilled at an angle so the cord exits on top of the board. A second hole is drilled through the board and the cord is laced down to end on the inside of the cover. The cords are not pasted in place until the book is almost finished.
-

- Holes drilled for cords, spine
-

- Holes drilled for cords, top
-
- Path for cords gouged
-
- Lacing cords, trial
-
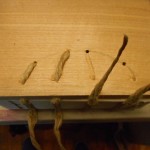
- Lacing cords, trial
-
- Lacing cords, trial
-
- Test fit
-
- Test fit
-
- Test fit
-
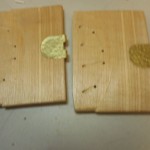
- Area for leather carved down
-
- Recessed corner (inside) for leather
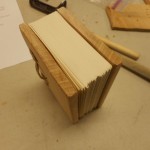
Once I knew that the cords and the boards fit, I pasted out the spine and ploughed the head and tail edges of the textblock. The boards were then adjusted to the new size of the text. Romanesque bindings tend to have little or no square or overhang. I didn’t plough the fore edge, but left that with an uneven, hand-torn edge.
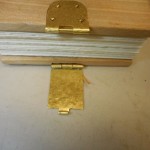
Next step was to move onto the metalwork phase, designing and making the fastening. Mine is full metal which is made in three pieces, the hinge and the catch, which are attached to the boards and the hasp, which closes the book. I started out drawing a paperboard pattern and scratching the pattern into a sheet of brass. I cut the pattern area off the sheet and textured it with a simple dimpling by hitting it with various sized ball peen hammers. The patterns for the hinge and catch were cut and trimmed and the edges smoothed. An area of the top and bottom boards was chiseled out just enough so that the brass and the board were level. I made pins for both pieces and rolled the brass tabs around them. That was the most difficult operation for me and I confess I had a lot of help to get it just right. Fitting the brass onto the boards involved a lot of filing, chiseling and frustration. Not much tolerance or leeway in any direction. I’ve forgotten the exact order, but the hinge and catch were fastened to the boards with rivets made from escutcheon pins and the hasp was added. After all the fiddling, I was very pleased when everything came together and the book actually closed properly and the latch worked! Because my book was short, I had only one clasp, but most people in the class had taller books and used two clasps.
-
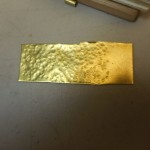
- Brass sheet
-
- Trimming the catch
-
- Trimming the catch
-
- Filing, Paperboard pattern in back
-

- Catch and soon-to-be hinge
-
- Fitting catch
-
- Hinge & Catch
-
- Brass, partly textured
-
- Hinge and unfinished hasp
-

- Hasp and hinge
-
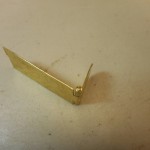
- Clasp Open
-
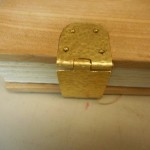
- Clasp closed
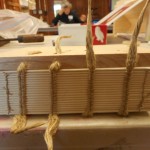
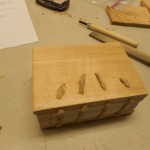
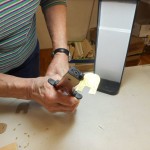
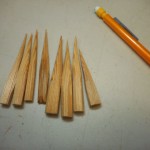
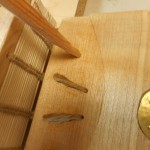
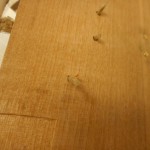
After the clasp was fitted and riveted, the boards were laced on for the final time. I pasted the cords into the grooves and then pegged the cords. Making the pegs took longer than inserting them. I am so not a whittler! The pegs are forced into the holes with the cords, pasted and trimmed. My pegs should have been a little thinner in the middle so they would have gone farther into the holes.
-
- Starting point
-
- Chiseling the peg
-
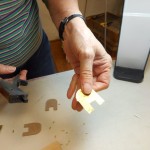
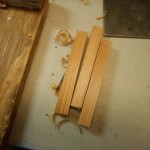
- Finished pegs
-
- Pushing peg into hole
-
- Peg points on the inside
-

- Trimmed peg
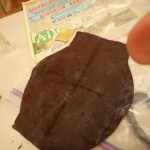
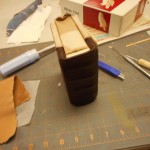
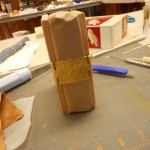
The last step is putting on the leather spine. The leather is carefully trimmed to shape and size. For my book, it was curved to fit the pattern on the boards and had a wide, straight-sided tab that would fold over the head and tail of the spine. Unfortunately, I took very few pictures of the leather work. The leather is first pared, head and tail so that it will fold easily. The curved edge should fit exactly into the carved groove. After pasting it out and letting the moisture penetrate the piece, I put the leather on the book, tugging and stretching it into place. Pasted leather is very easy to work with as it can be positioned and re-positioned many times until it is just right. It does stretch when damp, so I had to trim it a bit. That’s the tricky part and I did get a little too much off one edge. Before putting the leather on, I wrapped the textblock in craft paper to protect it as you can see in the photos.
-
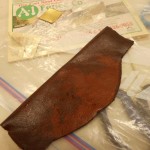
- Pasted leather, resting
-
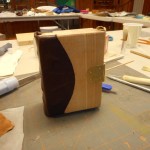
- Finished book
-
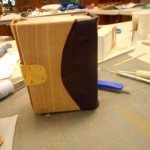
- Finished book
-
- Finished book
-
- Finished book
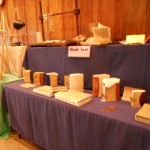
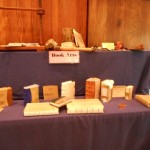
Quick look at the other books made this week.
These books take a lot of time and skill to make, so I’m not sure if I’ll ever make another one, but some of what I learned will be very useful in the future.