Update — November, 2015
I’ve been thinking about updating this page for a while and am finally tackling it. I have changed many things in the past three years; brand of paint, type of trays, paper and some techniques. I also wanted to add information that would try to answer some of the many questions I have gotten. The complete original post is at the end of this update.
The most frequent questions I am asked are about the basic physical components of marbling – alum, carrageenan, paint and paper. I haven’t changed the first two at all. Marbling carrageenan (not the food variety) mixed at 2.5 Tablespoons per Gallon of water (I use distilled, bottled) and marbling alum (again, not the food kind) mixed at 1 to 2 teaspoons per cup of water. I mix my alum a bit stronger than some recommendations just because I find it works better for me. The carrageenan is mixed in a high-speed blender and allowed to sit overnight. I usually mix the alum at the same time just because it’s one less step to do in the morning! The alum just needs to be stirred a bit to dissolve.
Paint
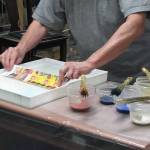
Paints can be tricky and you need to be willing to play a bit to find the brand and type that suits your purposes best. I have been converted to Golden’s Fluid Arcylics. I think they are easier to balance, have great pigment integration and provide intense colors. However, like all paint, they can be highly individual in the way you mix them. I start my paints with 1 part paint to about 1/2 part water and add water gradually to find the right balance. Colors vary a lot – blues & greens need more water, reds and yellows need less. Unlike the paints I used to use, even the toughest of the Golden colors needs only 20 to 30 stirs to create a good suspension and most need way less. I took a class where the paints had been pre-mixed and even though they were the same base paint that I use all the time, the water ratios were very different and it took a few papers for me to adjust my style to the paint. The moral is play, test, try and play some more until you find what suits you and how you plan to use your paper.
-
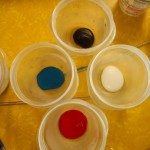
- Acrylic paint
-
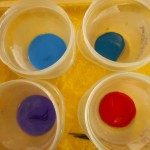
- Left side has water, right side just paint
-
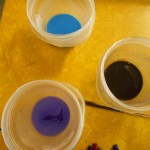
- Water added, not mixed
-

- Mixed paint & water
-
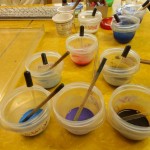
- Paints ready to use
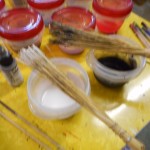
I use a piece of dowel to mix the paint. It’s tempting to just use the eyedropper, but not wise. I used to use plastic spoons, but find that the dowel provides a better surface for reintegrating pigment that has fallen out of suspension. Some paints, especially yellows and reds, rarely fall, but blues and ultramarines have to be stirred frequently. Metallics need stirring before almost every drop and the dowel provides a pestle-like action that works well. I much prefer using cups to leaving the paint in the bottles. Bottles will develop a thick sludge of pigment on the bottom, but with the cups you can see and control the sludge formation. I’ve used both snap lid and twist on cups and prefer the twist closure. It gives a tighter seal and avoids the splash episodes when I try to open a stuck snap-on lid! You do have to take care that the twist is fully sealed if you are leaving the paint for any period of time.
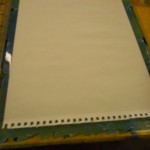
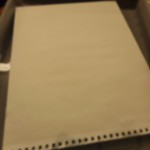
Paper
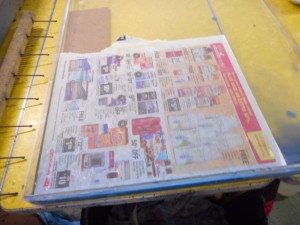
What paper you use depends entirely on what you plan to do with your marbled paper. Always keep end use in mind. Most of my paper ends up in my books; that’s why I started marbling in the first place. Therefore, I use a lot of drawing weight paper (70-80lbs, 100 – 130gsm). I also use a lot of card stock (65lb., 167 gsm.) for cards and for some book uses, but it is too heavy for endpapers. I have some beautifully marbled sheets of very heavy weight paper and even watercolor paper (400 lb.) that I love, but have yet to figure out what to do with them. Many marblers love Texoprint paper, but I am not a fan, partially because I don’t like the way it pastes down. I have tried marbling everything from paper napkins to mat board. So try, experiment, play! If you are just beginning, I suggest either a 70lb. drawing paper or card stock as they are both easy to handle and have many uses.
Fun sources of marbling paper are everywhere – discarded books, maps, old magazines, sheet music, junk mail, community flyers. Just look around. Slick and glossy papers are harder to marble since both the alum and paint tend to slide off, but you can have fun trying!
Tools
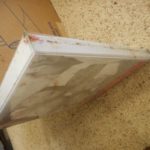
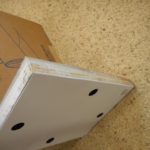
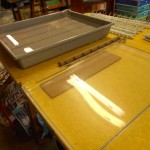
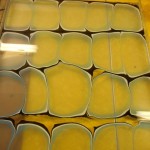
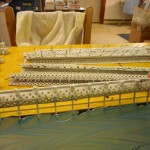
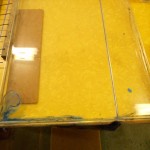
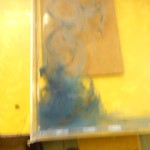
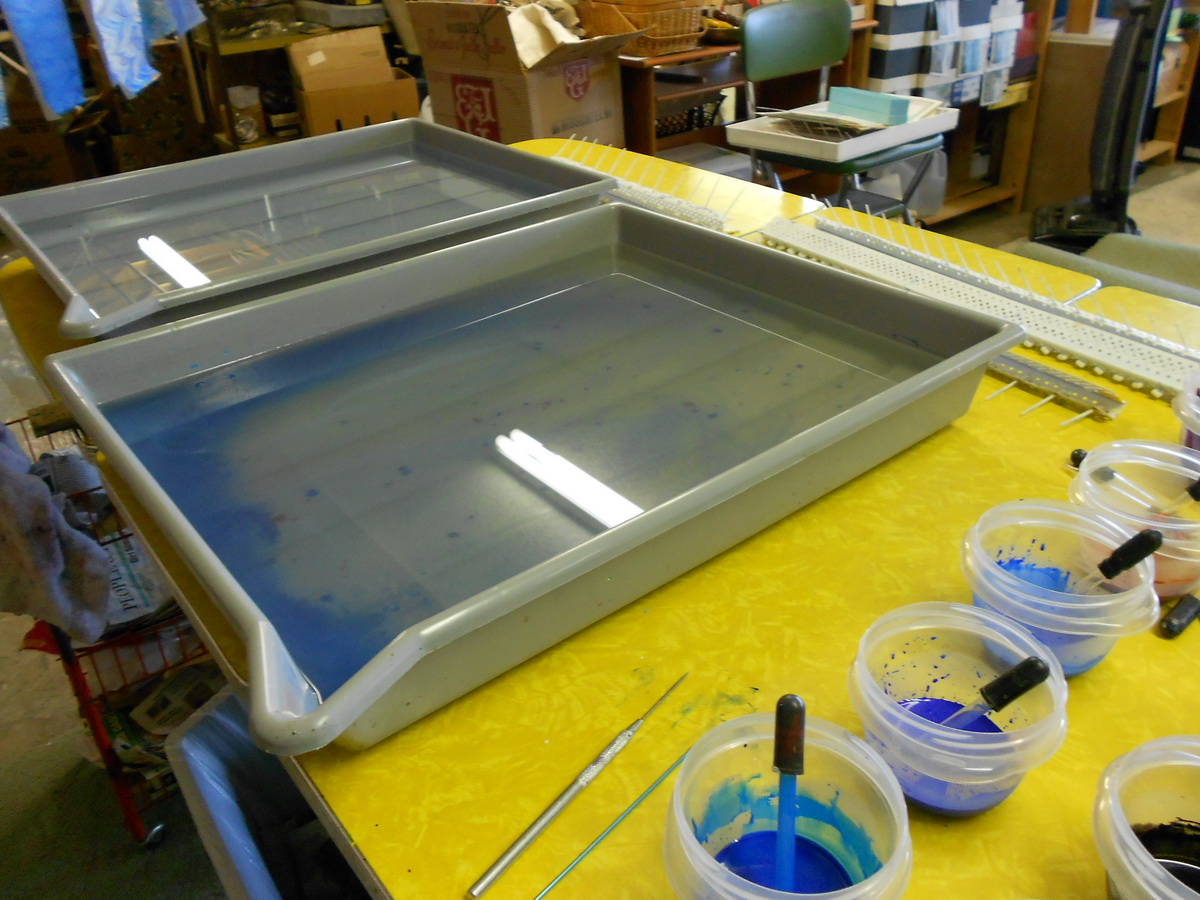
Trays – I have been using acrylic photo frames for marbling for a while now. They come in an array of sizes, are about one inch deep and, best of all, inexpensive. Look for frames that wrap around the sides with no seams or edging. Here are mine:
-

- Tray that’s really a frame
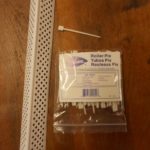
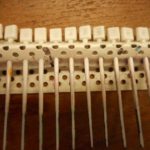
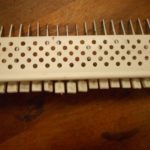
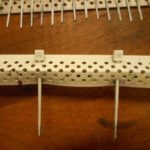
Quick closeup of the combs made by inserting roller pix into drywall corner bead.
-
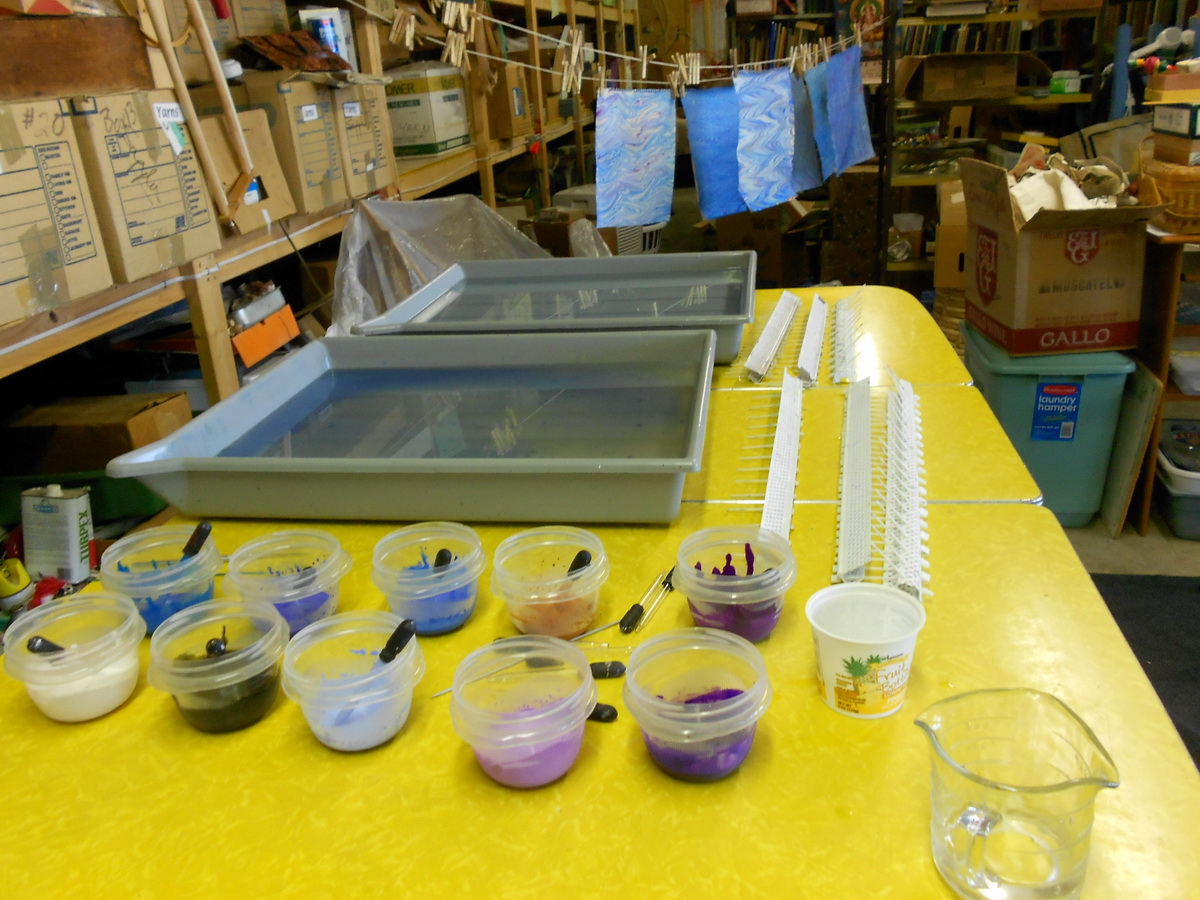
- Supplies
-
- Front
-
- Back
-
- Wide rake
to be added ….. ….
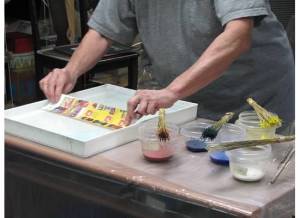
Setup
Everyone has different way to set up a work space. Here’s mine. I work at a large bright yellow kitchen table in my basement. There is a large sink a few steps away to my right. Just to the right of the marbling table is a card table that I use to prepare my paper with alum. Six to eight pieces of alumed paper are stacked there under a light piece of press board. The board prevents the paper from curling and help keeps it slightly damp. The marbling table – from right to left – has paint cups, marbling tray, rinse tray. Combs and rakes start out above the trays, short on right, long on left. By the end of a session, they are wherever I dropped them. I also have a little red rolling cart that fits under the table which holds newspaper skimmers, wiping rags, shims etc. Most importantly, there’s a big trash can for used skimmers right under the table. I have double lines for drying the paper a few steps to the left. Even being in the basement with a concrete floor, I keep a dropcloth under the drying line. Carrageenan is very slippery!
-
- Water bath next to marbling tray
-
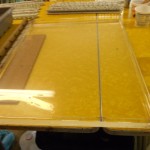
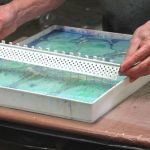
- Tray with carrageenan
-
- Paints ready to use
-

- Rakes & combs
-
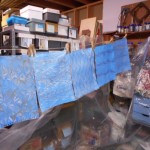
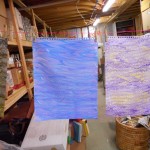
- Drying line
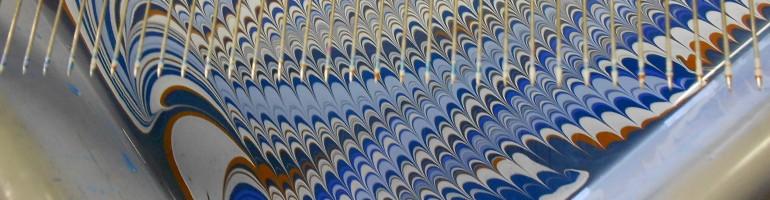
Starting to Marble
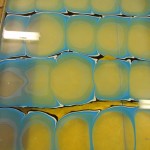
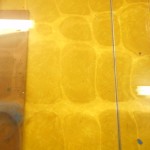
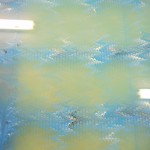
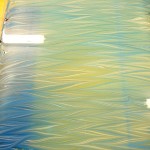
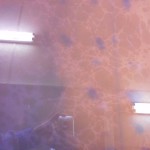
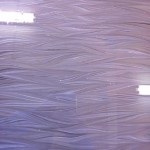
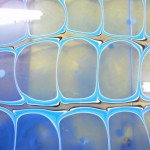
Now that I have everything set up, I can start having fun. First move is to skim the carrageenan. No matter how carefully I skim, the first tray usually has some contamination and my first paper is a mess. I expect that. I also use the first tray to check on the paints – how they are spreading, if they are dropping out at all, basic colors, etc.
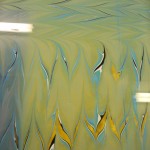
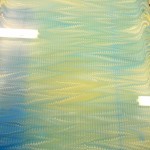
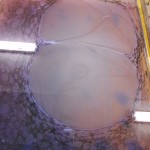
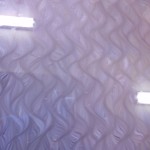
In the photos below, please note: the table is yellow and showing through the carrageenan, no yellow paint was dropped; the two horizontal white bars are reflections of my overhead lights; the brown rectangle on the left side is a shim under the tray to level it.
-

- Black first drop
-
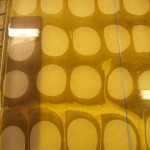
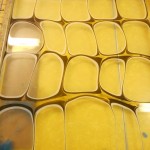
- White second drop
-
- Blue third drop
-
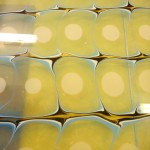
- Another blue drop
-
- Last blue
-
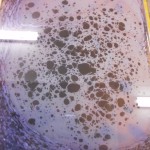
- Paint “dropping out”
-
- Starting get-gel, vertical
-
- Finishing get-gel, horizontal
-
- Ready to rake
-
- Raked pattern
-
- Raked again, horizontally
-
- Printed
-
- Washing
-
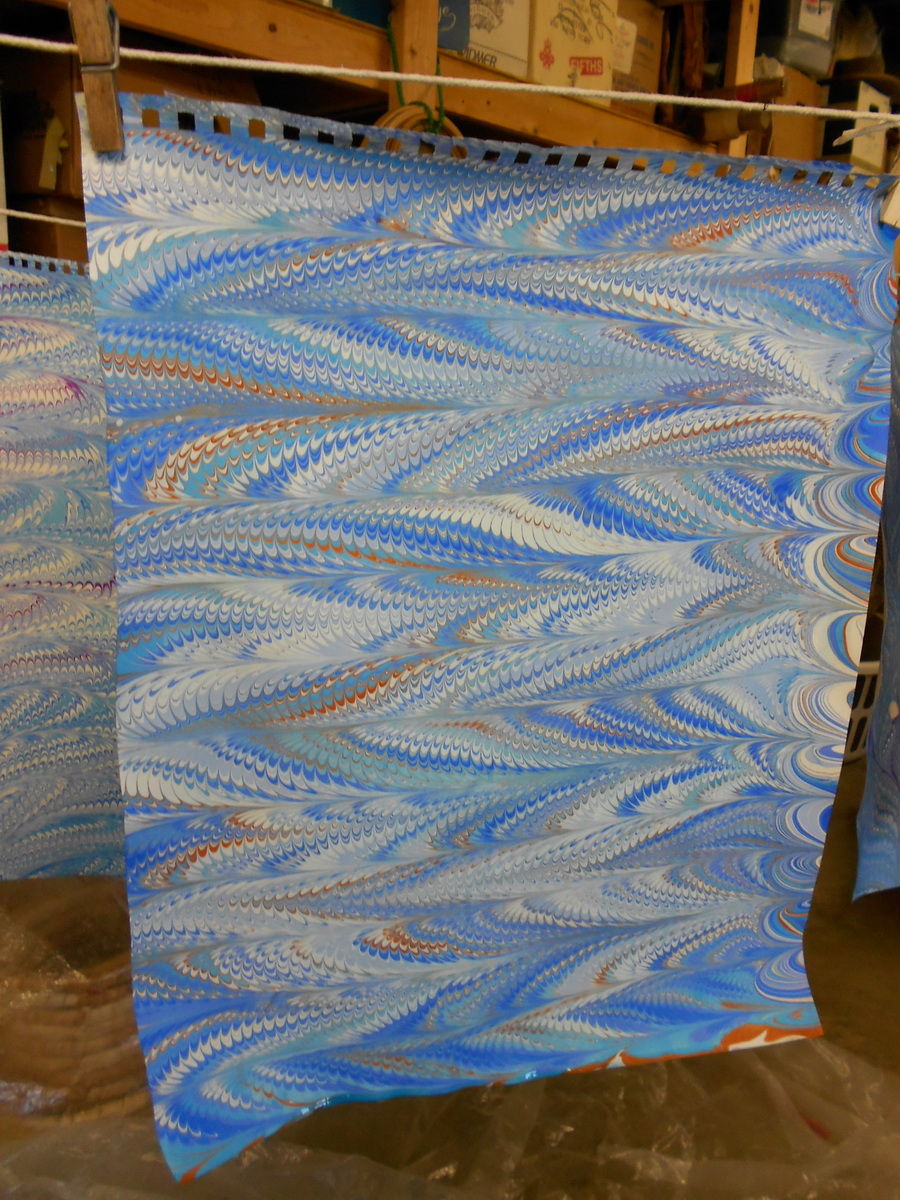
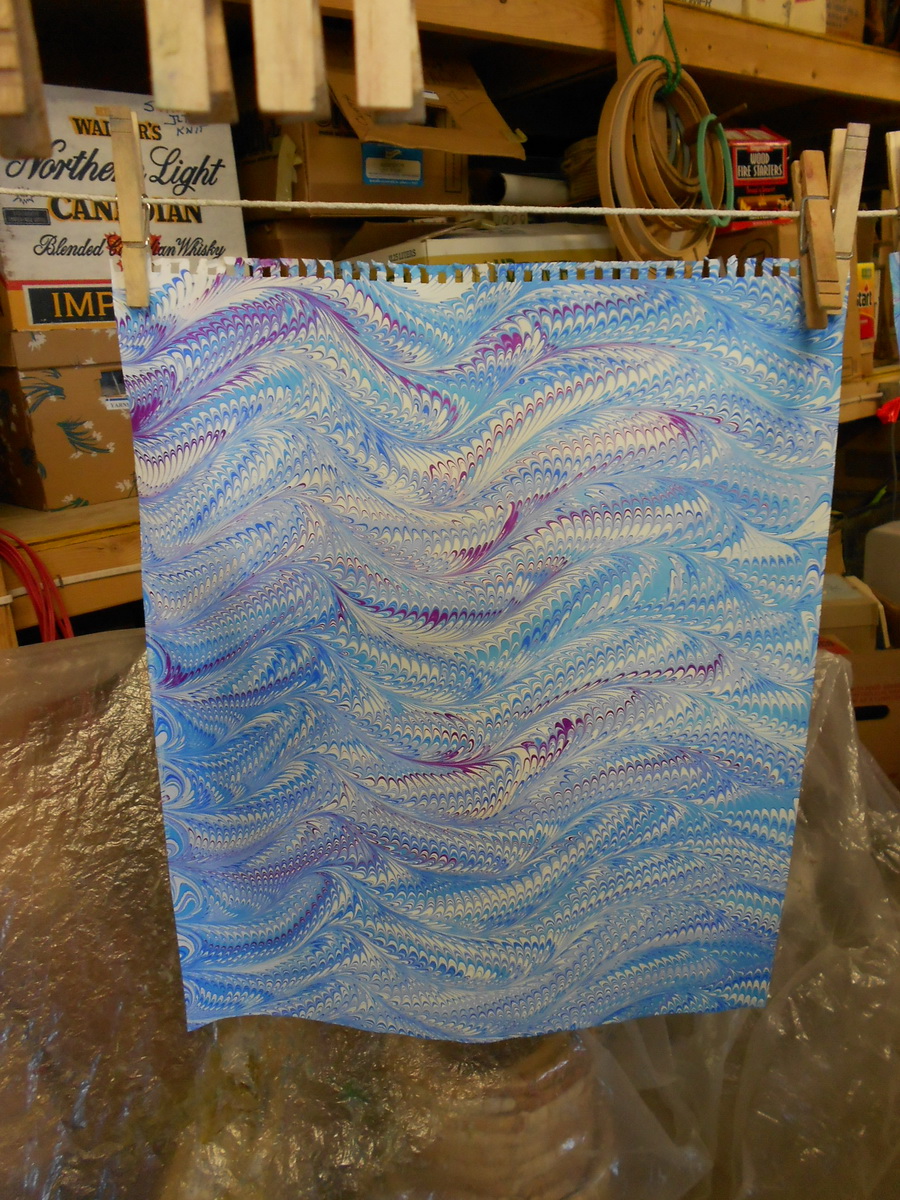
- Hanging on line
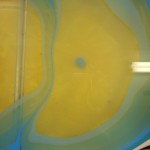
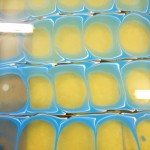
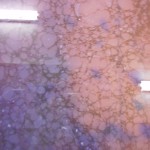
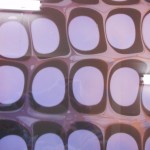
The first color I dropped was black. I like to do that for two reasons, I can see the paint more easily as it spreads (a light color tends to disappear) and it results in a fine black line that helps define the pattern on the finished work. As usual, there was some contamination at the bottom of the tray causing the jagged outlines on the circles. You can follow the results of the initial problem throughout the photos. As each succeeding color is dropped, it pushes the previous colors, concentrating them into smaller areas and making the paint denser and brighter. It’s important to plan ahead: the first color dropped will be the strongest on your finished paper. It may also have the narrowest line.
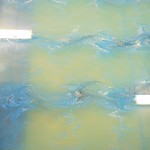
At one point a bit of the blue “dropped out” ending up as a glob of paint on the bottom of the tray. In this case, I think it was just a bit of pigment that hadn’t been thoroughly mixed. If the same color had dropped out in all the circles, I would have gone back and added a few drops of water and tried again. If the paint had continued to drop out, I would have added a single drop of Acrylic Flow Release. On the get-gel photos, I used a stylus rather than rakes and stopped halfway across the tray to take the photo. At the very bottom of this page there are two photos of me making the get-gel pattern with rakes. After the get-gel was completed, I raked the pattern once horizontally and once vertically. After laying down the paper, I stopped to take a picture. I don’t normally leave the paper sitting on the paint as the paint is transferred to the paper as soon as it touches it. Anything done after the first touch doesn’t affect the print. When I wash paper, I place the paper on the water face down and then gently swish until the entire back of the paper is wet. If the back remains dry, the paper tends to curl and dry unevenly which can cause problems. The paper is taken out of the water and hung on my line. In this case it is upside down as you can see from the placement of the white spots that were caused by the contamination in the tray. Those are areas of white paper showing through because the paint couldn’t float into that area of the tray.
Second try
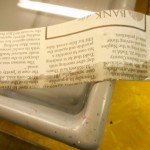
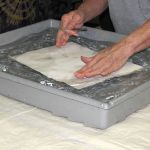
Before dropping any paint for the second sheet of paper, the size must be skimmed. I use narrow ( c.2″ wide) strips of newspaper, but there are other ways to skim. To use a newspaper strip, hold a piece of newspaper the width of the tray between your hands. Place the ends (you can fold over any excess paper) in the two top corners so that about 1/4″ of the newspaper is on the size. Gently pull the newspaper towards the bottom of the tray, keeping it taut, but not tight enough to tear, by pressing the newspaper against the tray sides with your fingers. Your fingers should not have to enter the size. It’s harder to explain than to do! Here’s a photo of what I’m trying to say:
Using newspaper strip to clean carrageenan
Another way of skimming is to lay a larger sheet of newspaper down on the carageenan, as if you were “printing” and lift it off.
Using large newspaper as skim
Before and after skimming.
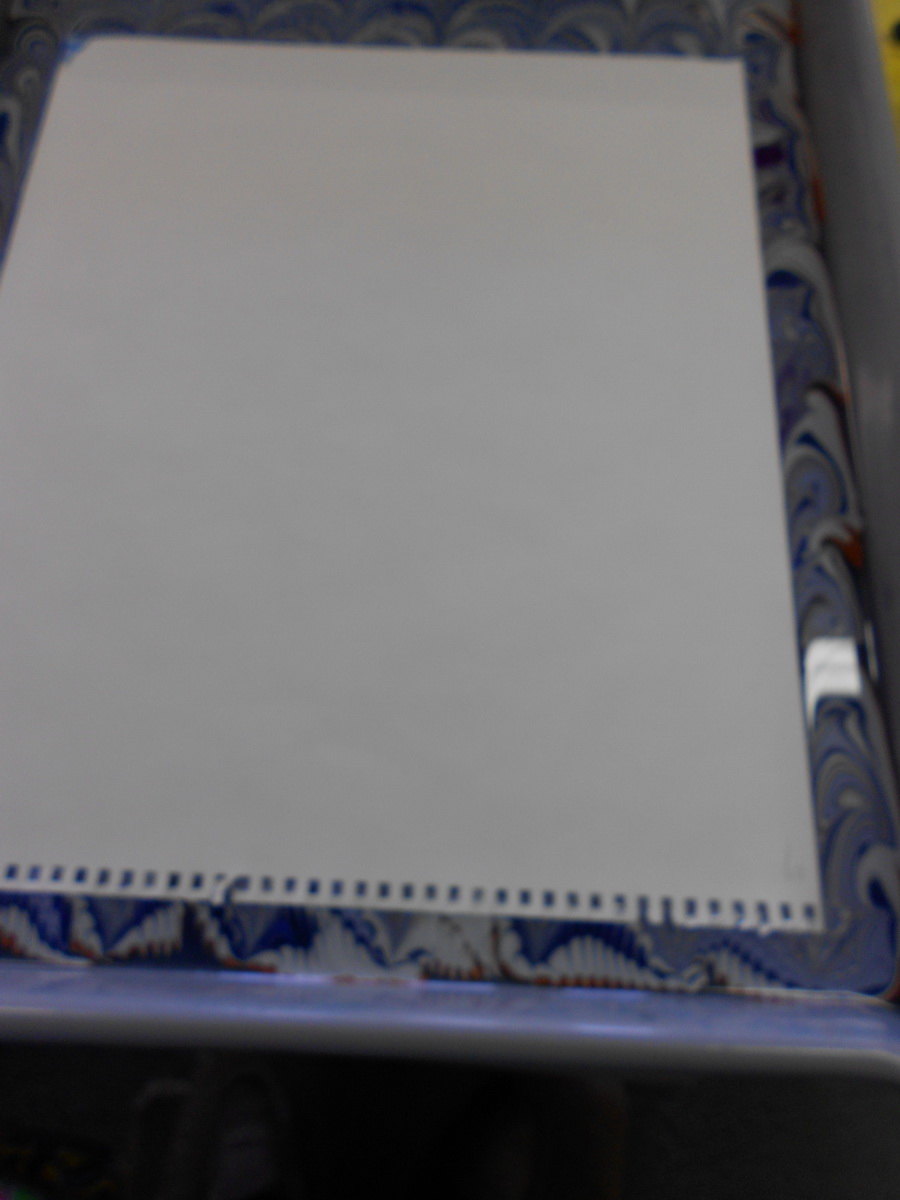
-
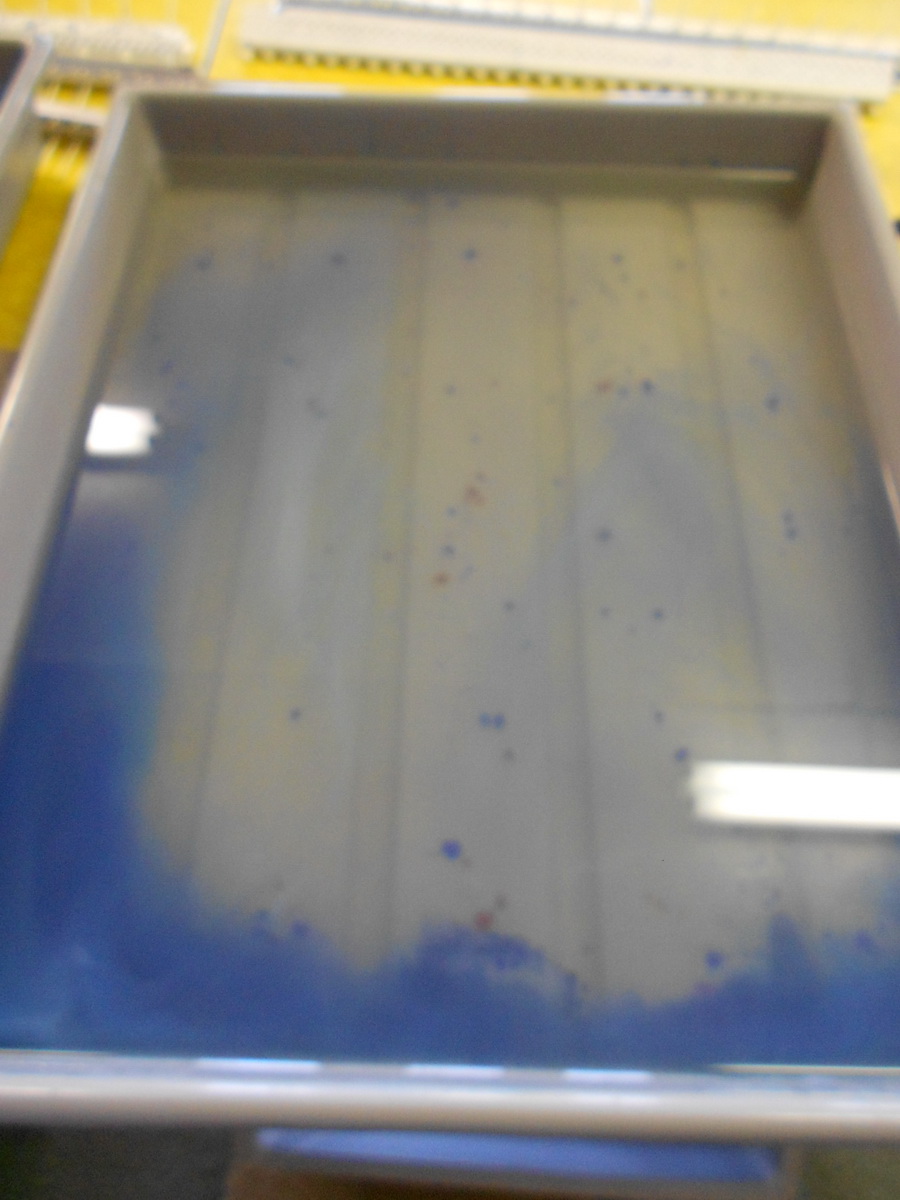
- Tray after paper is picked up
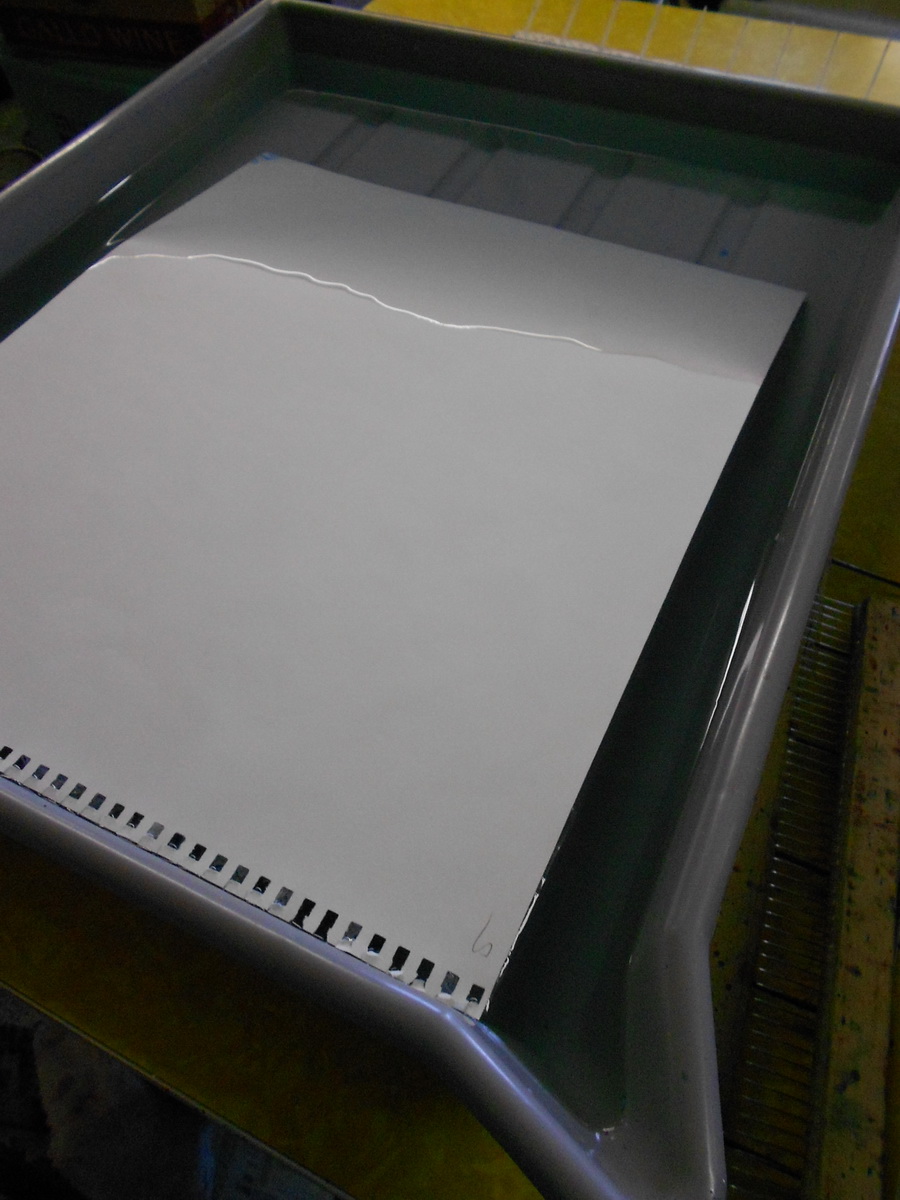
-
- Tray after skimming
-
- Skimmer showing no color
-
- Paint that is collecting below the surface
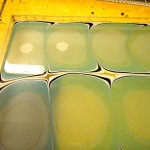
The first photo shows the paint left in the tray after the paper is printed. Ignore the straight silver line. It’s part of the table. After skimming, you’ll be left with some paint that has already sunk into the size. It will not affect your next paper and will cause more problems if you try to go deep enough into the size to capture it. The photo of the skimmer shows that there is no color left on the surface.
Dropping paint for my second sheet.
-
- No jagged edges this time
-
- Second & third colors dropped
-
- White slowly expanding against yellow
-
- All colors dropped
-
- Get-gel with rake
-
- After down and up passes with rake
-
- Raked side-wise, back & forth
-
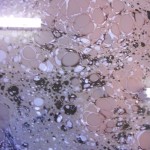
- Combed into nonpareil
-
- Wavy wide rake over nonpariel
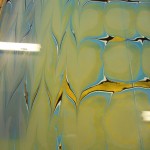
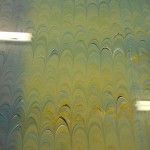
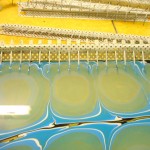
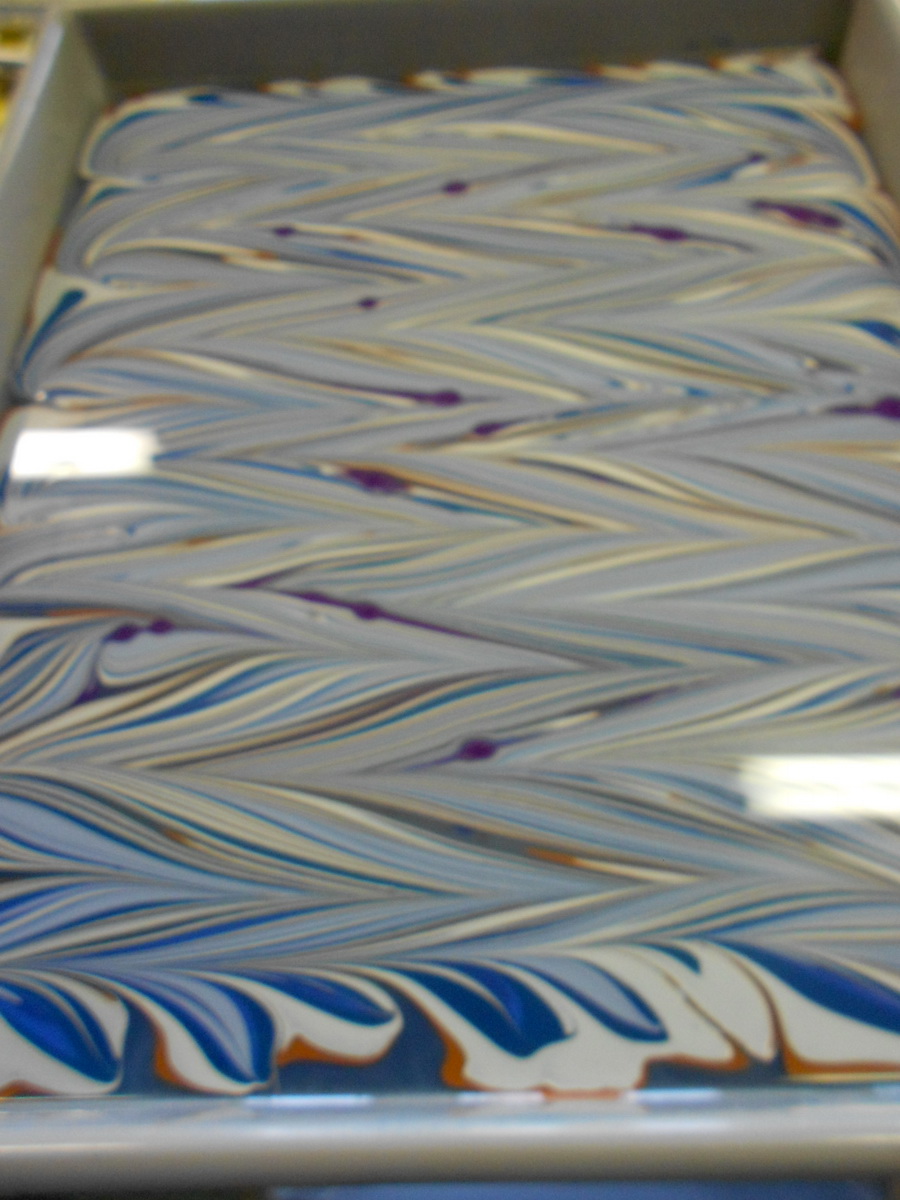
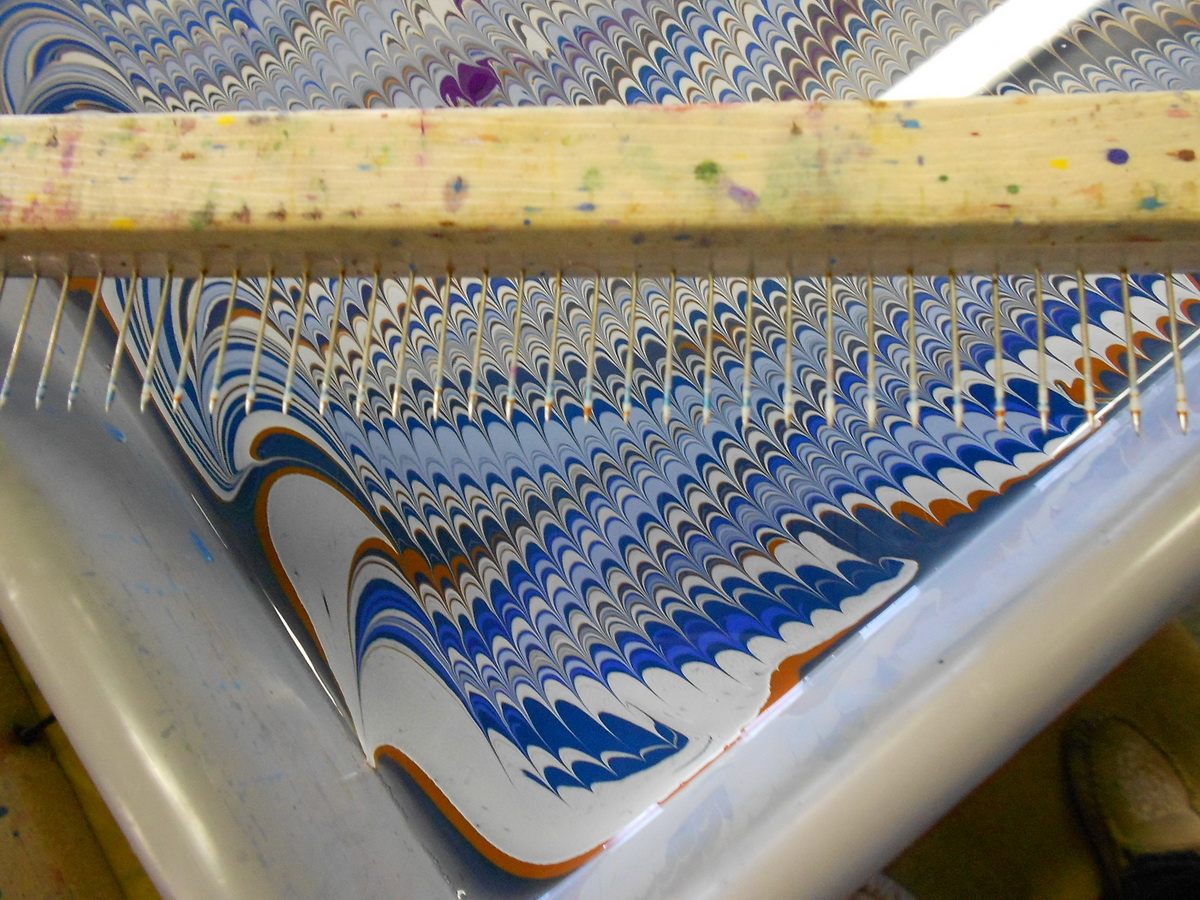
On this tray, I made the get-gel pattern using rakes instead of the stylus. This needs two rakes with the same distance between the teeth. One rake is an inch or so shorter than the width of the tray, the other is a bit shorter than the tray’s length. That’s in an ideal world! Since I’m using tools from disparate sources, they don’t quite match up. You can comb either direction first. If you are good at planning ahead, try to have the length of the pattern match the grain (not necessarily the length) of the paper you are using. To make the get-gel, place the short rake at the top of the tray with the tines about 1/4″ into the carrageenan. Don’t drag the tines along the bottom! With one hand on each end of the rake, slowly pull it toward you. When you reach the bottom, slide the rake over so that the tines are between the lines you have just made and slowly push the rake back to the top of the tray. Moving the rake too quickly can create a “wave” in front of it. Take the long rake and repeat, going from side to side. For this paper, I finished off with combing a vertical nonpareil pattern and then a wavy, side-to-side rake. The important thing here is to compare the raked get-gel to the free-hand stylus get-gel. The former makes a grid-like pattern that underlies any further raking or combing. The stylus method is freer and gives more of a stripe than a grid. I use both methods, depending on my mood and what I want for my final piece.
Third time pays for all.
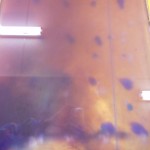
After skimming, I started my third tray in my usual way, but ran into a bit of a problem when I wanted to drop some white. Yellows tend to be very strong colors in that they spread a lot and don’t let other colors spread. I was trying to drop white, but it wasn’t strong enough to spread against the yellow. I could have added more water or Flow Release, but if I did that, the white would be too strong when I went back to using it with the blues. I could have mixed two cups of white, one strong and the other normal, but that was too much work. I capitulated and just used another yellow instead of white. You really need to be flexible while marbling. The paints do have their own personalities.
-
- White not spreading
-
- Went with yellow
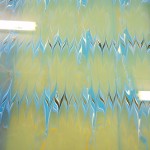
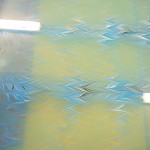
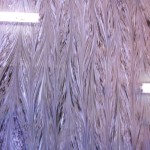
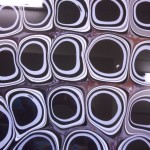
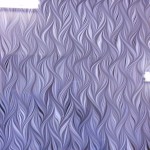
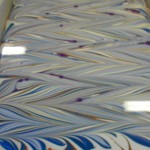
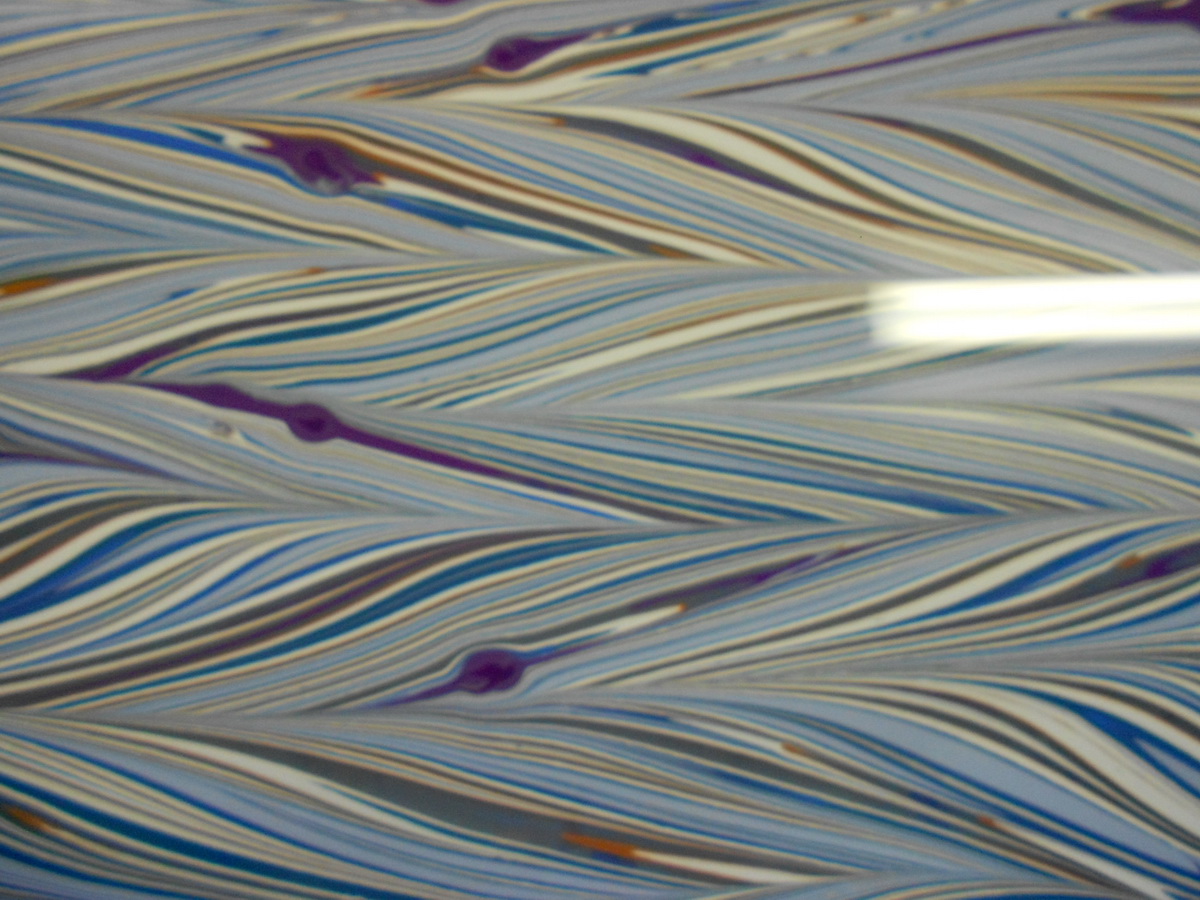
I proceeded with the get-gel, nonpareil, and finished with a waved Gothic.
-
- Get-gel
-
- Nonpareil
-
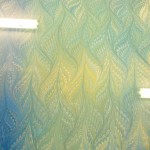
- Waved Gothic
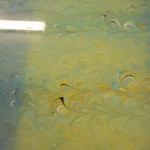
Laid down the paper, but as I lifted it I saw those tell-tale rings that I hate! Those rings on the size are the remains of an air bubble that formed as I laid down the paper. The bubbles created the white spots a trails on the finished piece. So much for a wonderful paper. At least there’s quite a bit of pattern that I can use.
Starting with Stones
Instead of using circles or eggs to get your paint onto the size, many marblers like to throw stones. It is a bit faster and much more fun! I like to use circles in the beginning because it’s easier for me to judge how the paint is spreading and the balance among the colors. Some patterns work better with the colors being more ordered, others with the randomness of stones. It’s all what you like and what works for you.
I did two similar black and white pieces. The first was just stones, the second combined circles and stones. I apologize for the bad photography. Several are out of focus and you can see my reflection on the bottom left of some. I need to go back and take better shots some day.
-
- Whisks and paint
-
- Throwing stones
-
- Throwing stones
-
- Throwing boulders, by mistake
-
- Throwing stones
-
- Throwing stones
-
- Get-gel
-
- Get-gel
-
- Out of focus pattern
-
- Stones
-
- Circles over stones
-
- More stones
-
- More stones
-
- More circles
-
- Finished pattern
In spite of the lack of clear focus, I think you can see the results of using the stone technique of getting the paint on the size. There are several other ways of doing it – shaking bottles, blowing, using an atomizer – the goal is covering the surface of your size with paint that floats on the surface. As with so many things in marbling, whatever works for you is good.
Odds and Ends
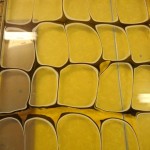
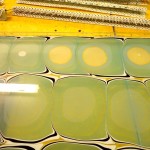
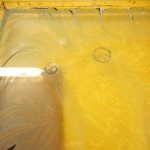
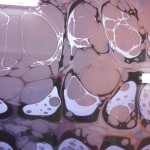
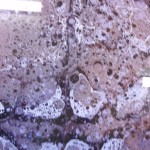
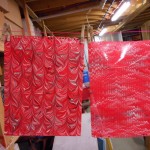
Here are some more pictures of other pieces I did in this marbling session as well as shots of what my tray looks like after three days of marbling. Not quite as pristine as when I started. Some marblers have the ability to keep a really clean tray throughout, but I don’t!
-
- Tray after a day’s marbling
-
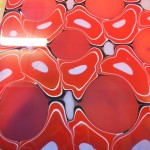
- Red tray
-
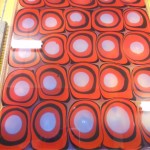
- 2nd Red Tray
-
- Red papers
-
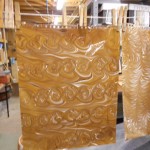
- More papers
-
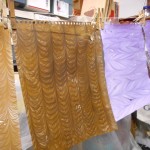
- More papers
-
- More papers
Many thanks to all of you who have already responded with questions and comments. I hope this update has been informative and useful. If you have further questions, please ask. I’ll try to answer even though I’m not an expert on many phases of marbling. I just try to share what has worked for me.
Original post — May, 2012
My studio is in my basement, as you can see in the photos by all the shelves of stuff in the background. What you can’t see is the other wall which opens at ground level and has windows the full length of the basement. It gives great natural light and makes a very pleasant working space. Fortunately, I have a good sink, a washable table and a floor that I don’t worry about.
There’s a lot of prep work for a marbling session. The first task is to make the carrageenan which provides the “size” on which the paints float. Carrageenan must be made at least 12 hours before you want to start marbling. I make it the evening before in a high-speed blender and it takes that long for the foam and bubbles to dissipate. At the same time, I mix alum to act as a mordant so the paint will bond with the paper. I also like to mix the paint the evening before as it seems to provide time for the paint to have a more even consistency and eliminate flecks and spots. I use acrylic paints and they need to be thinned just a bit to float properly. I have well water which is chock full of interesting minerals – iron, sulfur and more – so when preparing the size or paints, I use bottled distilled water. Most municipal water can be used as is.
The trays I use are photographic developing trays, rather than true marbling trays. The largest size paper that I can use is about 14″ x 17″. The carrageenan is in one tray and plain water in the second.
First step in the morning is to coat several sheets of paper with alum and let them rest under a light weight, just enough to prevent them from curling. While the paper is curing, I hang up my line and spread a dropcloth under it, cut newspaper for skimming and make sure all the paints are ready to go.
During this session, I used eye droppers to drop paint onto the size. Sometimes I use broomstraw whisks which creates a “stone” pattern  rather than the egg pattern shown in the photos. Using the eyedropper creates a more regular pattern and I find it easier to control. The whisk is more fun and gives more free form results. It is also faster. It depends on my mood as well as the results I’m trying to achieve which technique I use. I rarely use both just because there’s twice as much cleanup involved – both droppers and whisks can be a pain to clean!
Photos of the process
-
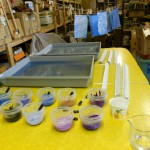
- Paints, rakes & combs, trays and hanging area
-
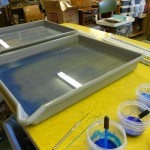
- Marbling tray, rinse tray and paints. Ready to go!
-

- Cleaned size ready for new pattern. Colors have dropped to bottom and will not affect new paint
-
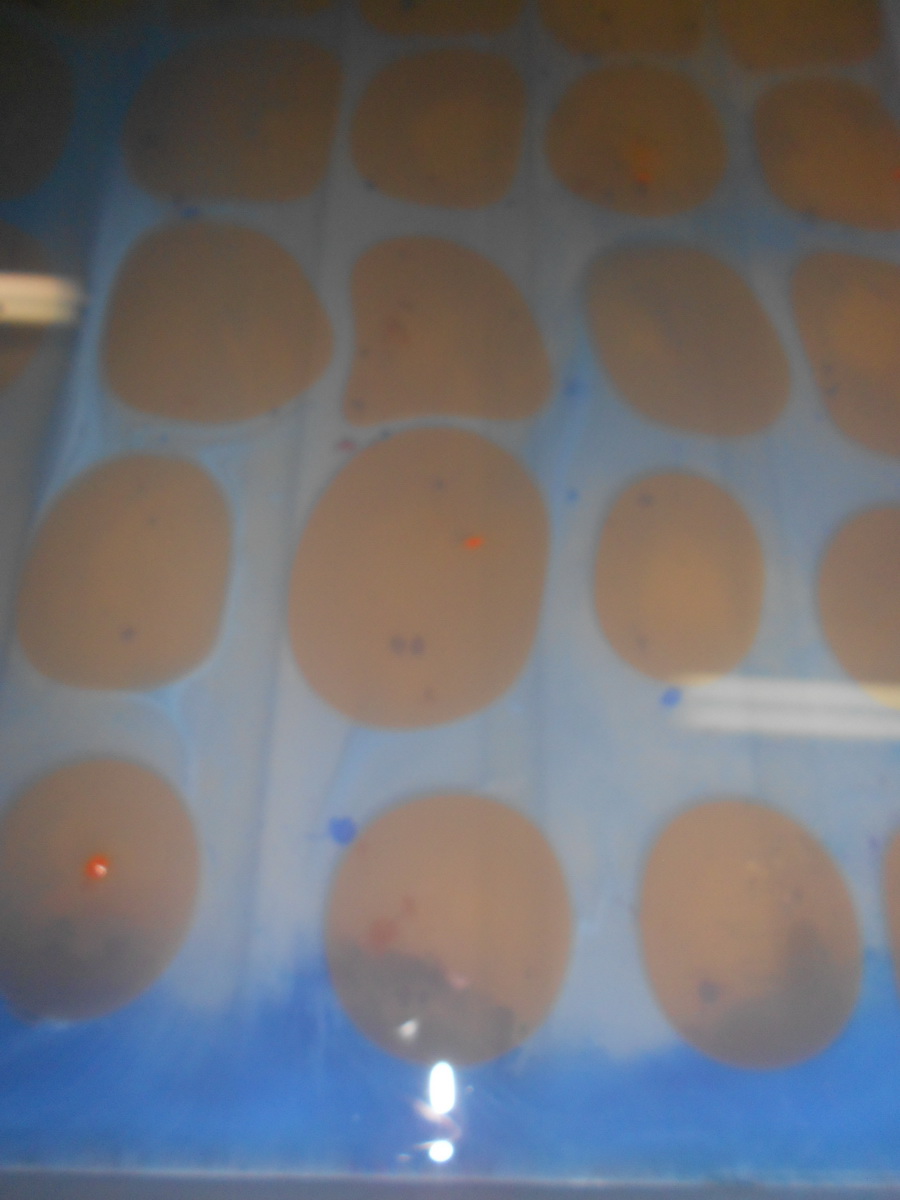
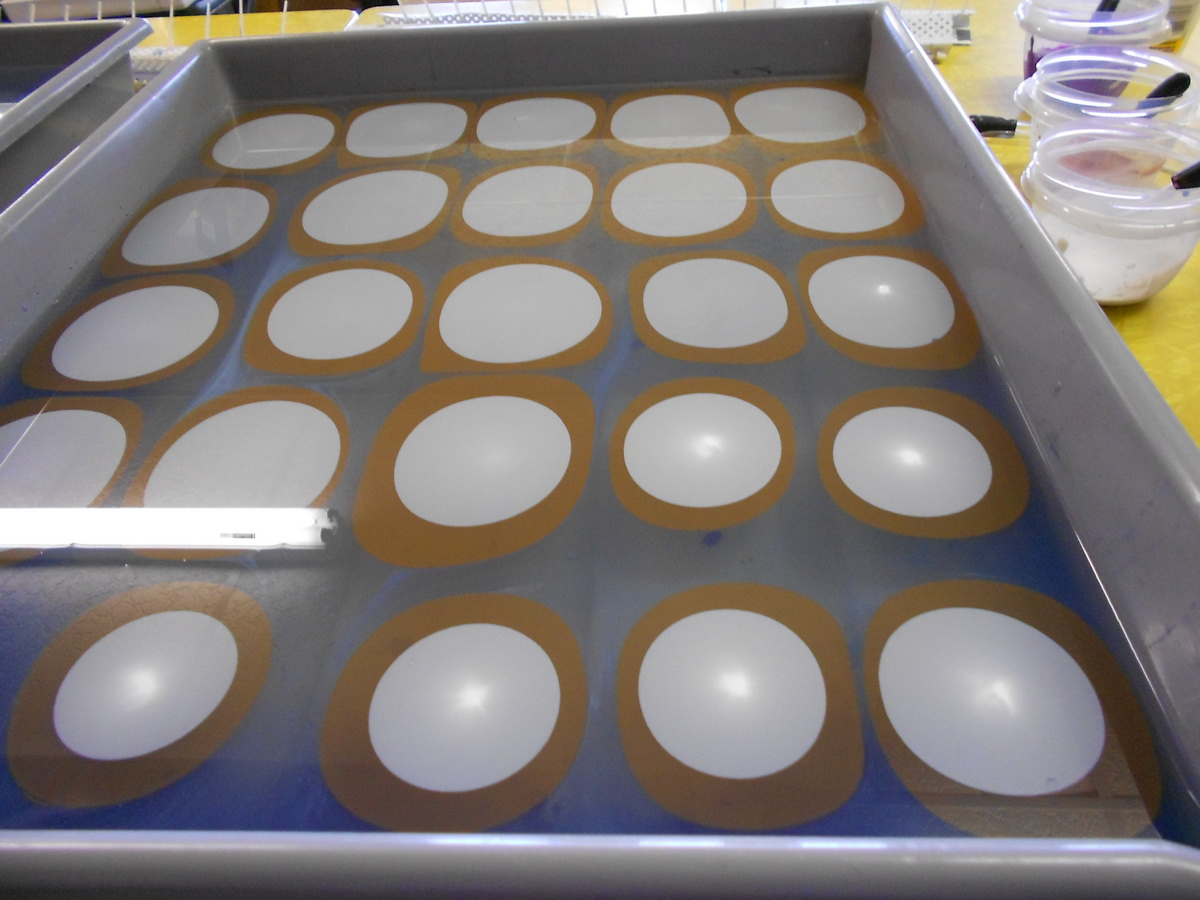
- First layer of brown paint added to tray with eyedropper
-
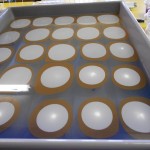
- White paint dropped inside brown
-
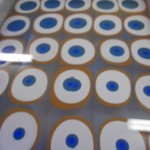
- Dark blue added inside white
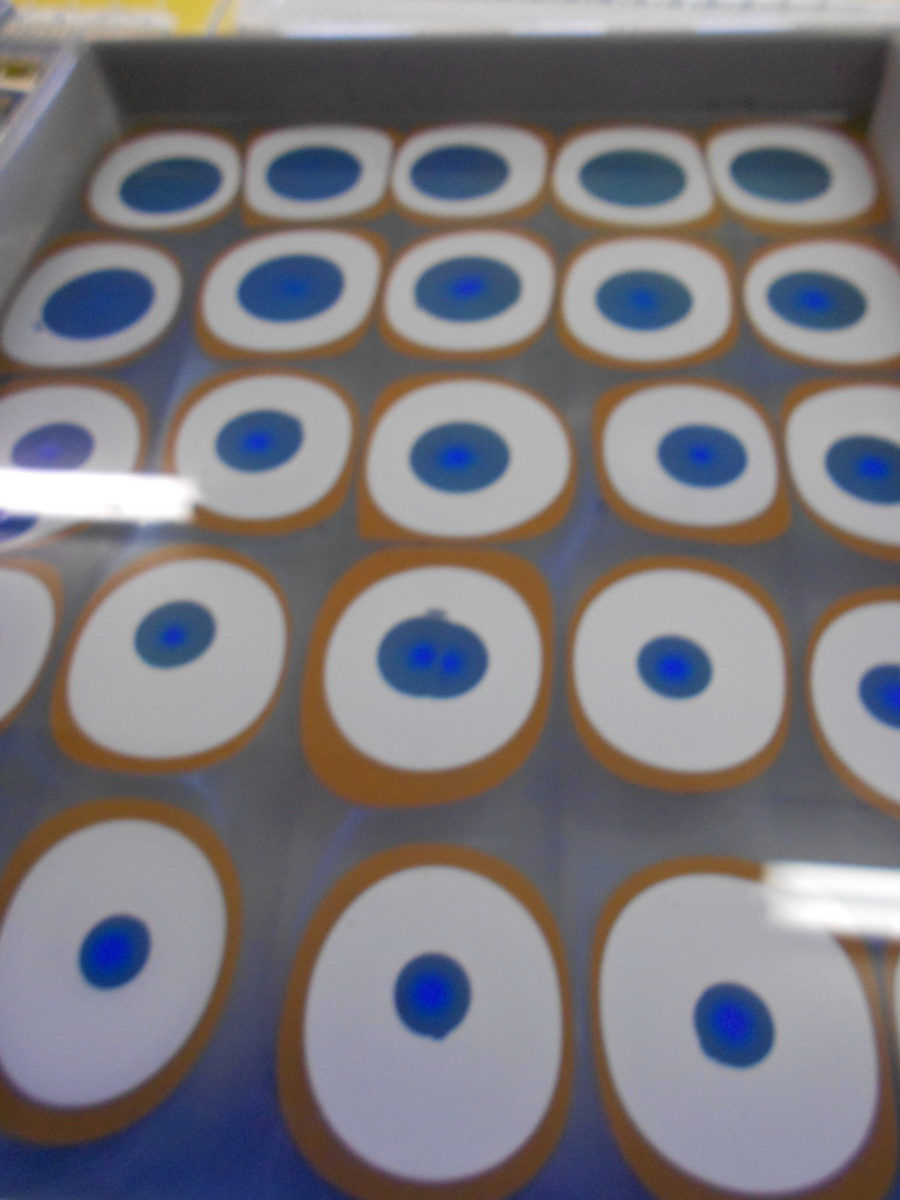
-
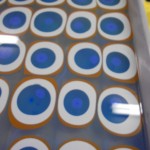
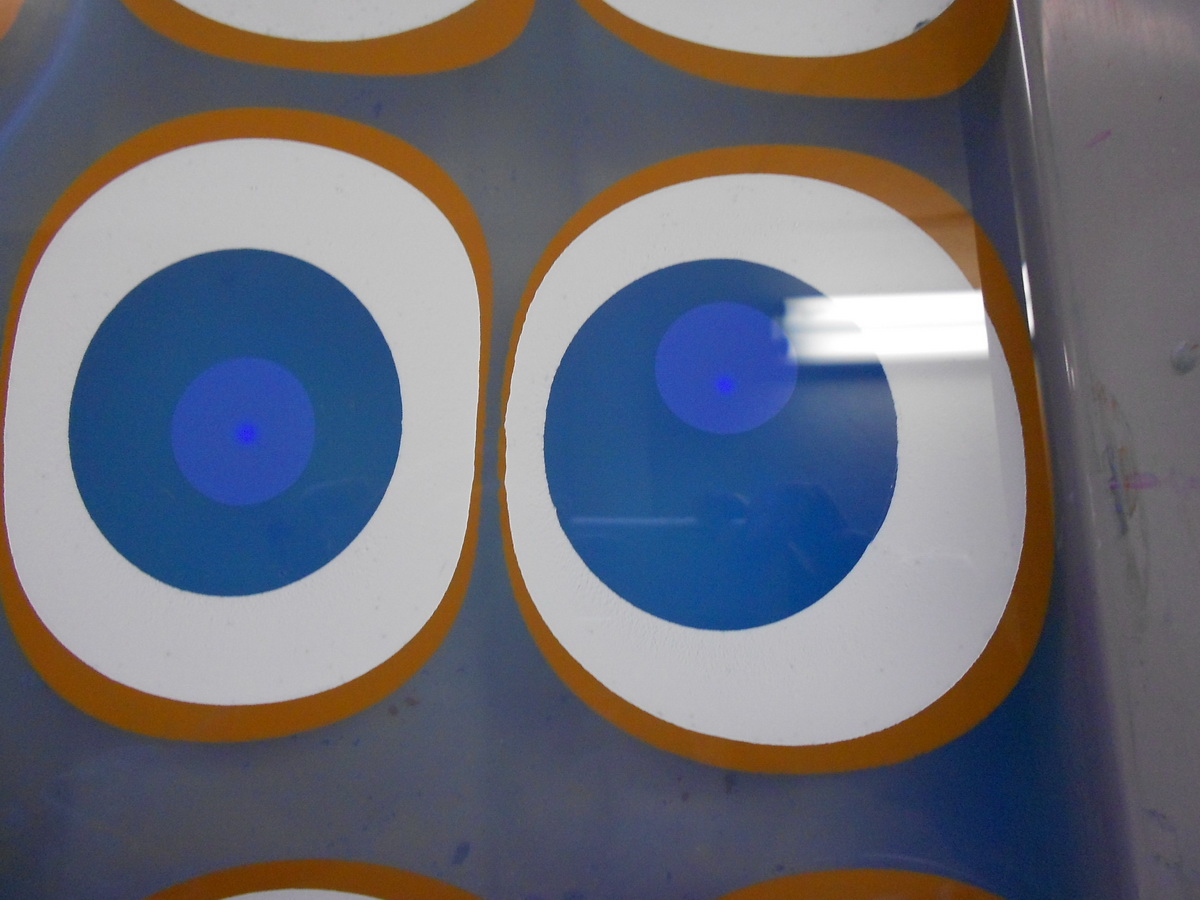
- Medium blue added
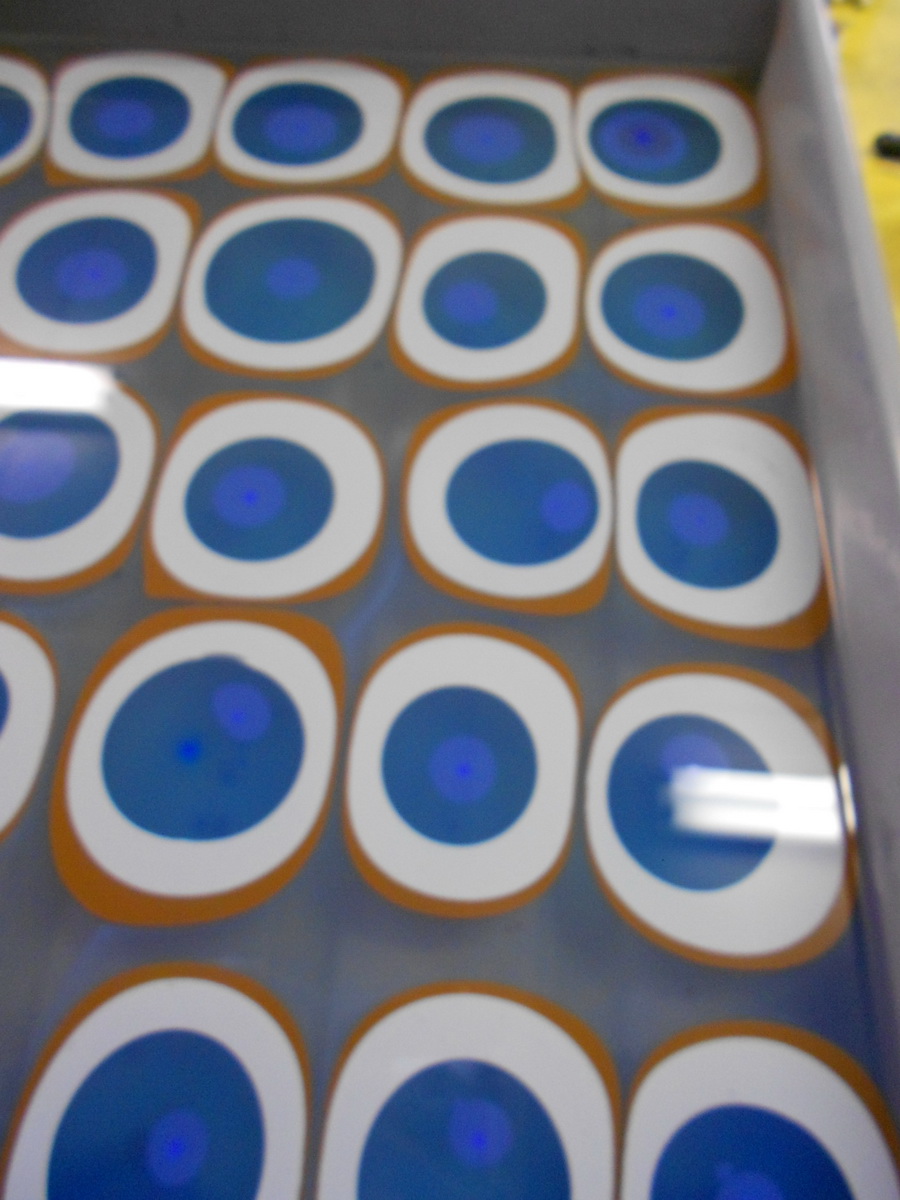
-

- Medium blue added – Close-up
-
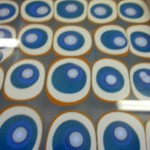
- Light blue added
-
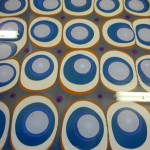
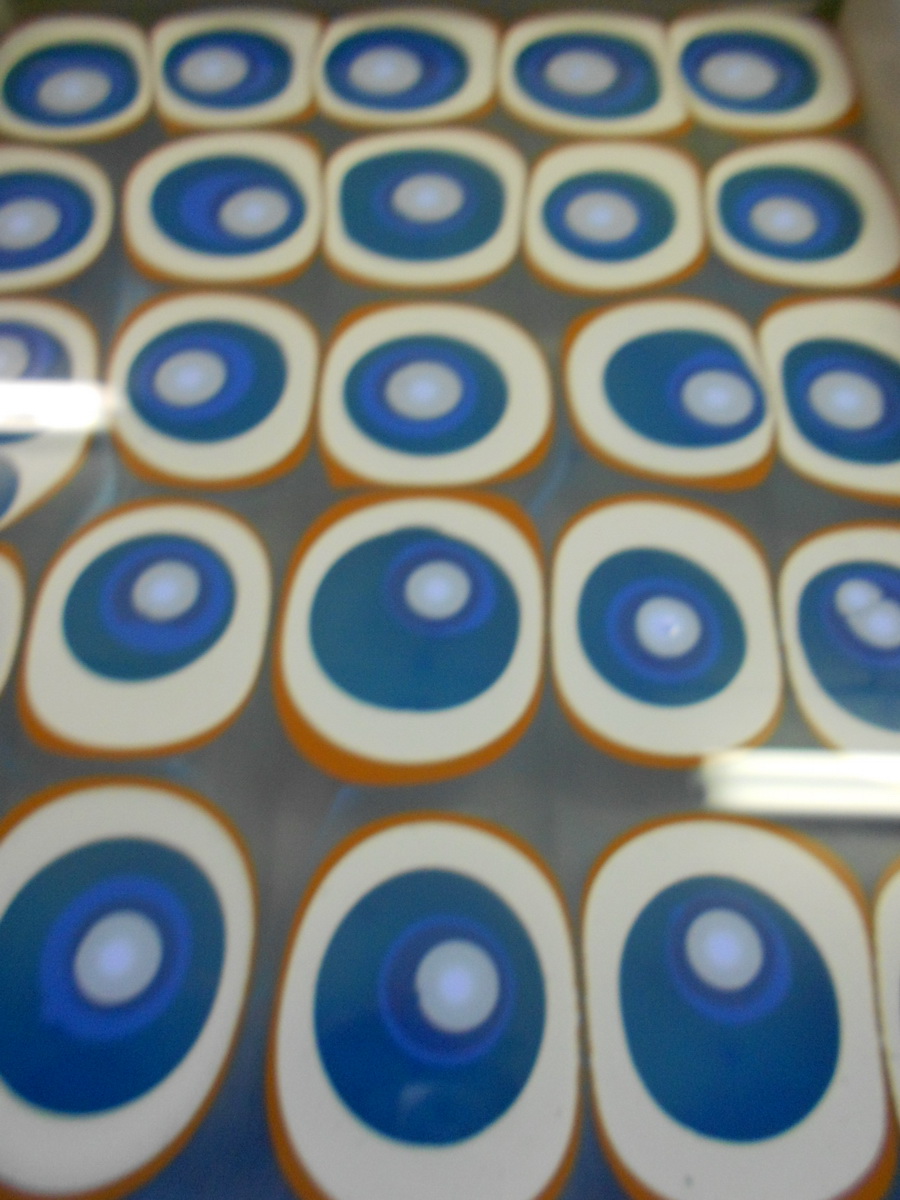
- Last color – purple in between “eggs”
-

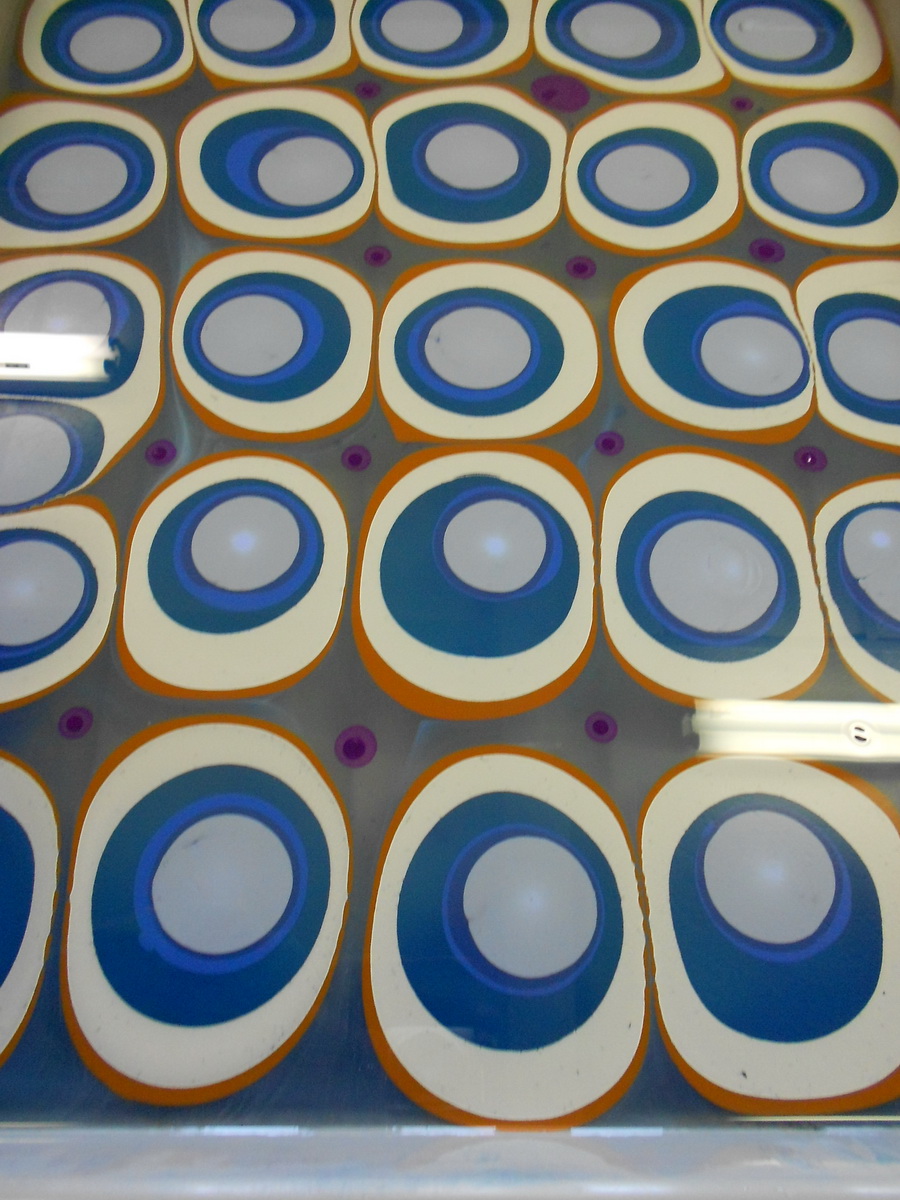
- Beginning of making get-gel design with stylus
-
- Get-gel pattern in tray
-
- Marbling tray showing the purple paint still expanding
-
- Marbling comb resting on tray above nonpareil pattern
-
- Combed get-gel into Nonpareil pattern in tray

-
- Raking the Nonpareil gives Finished design in marbling tray

-
- Laying paper on top of design
-
- Rinsing off excess paint and carrageenan
-
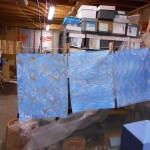
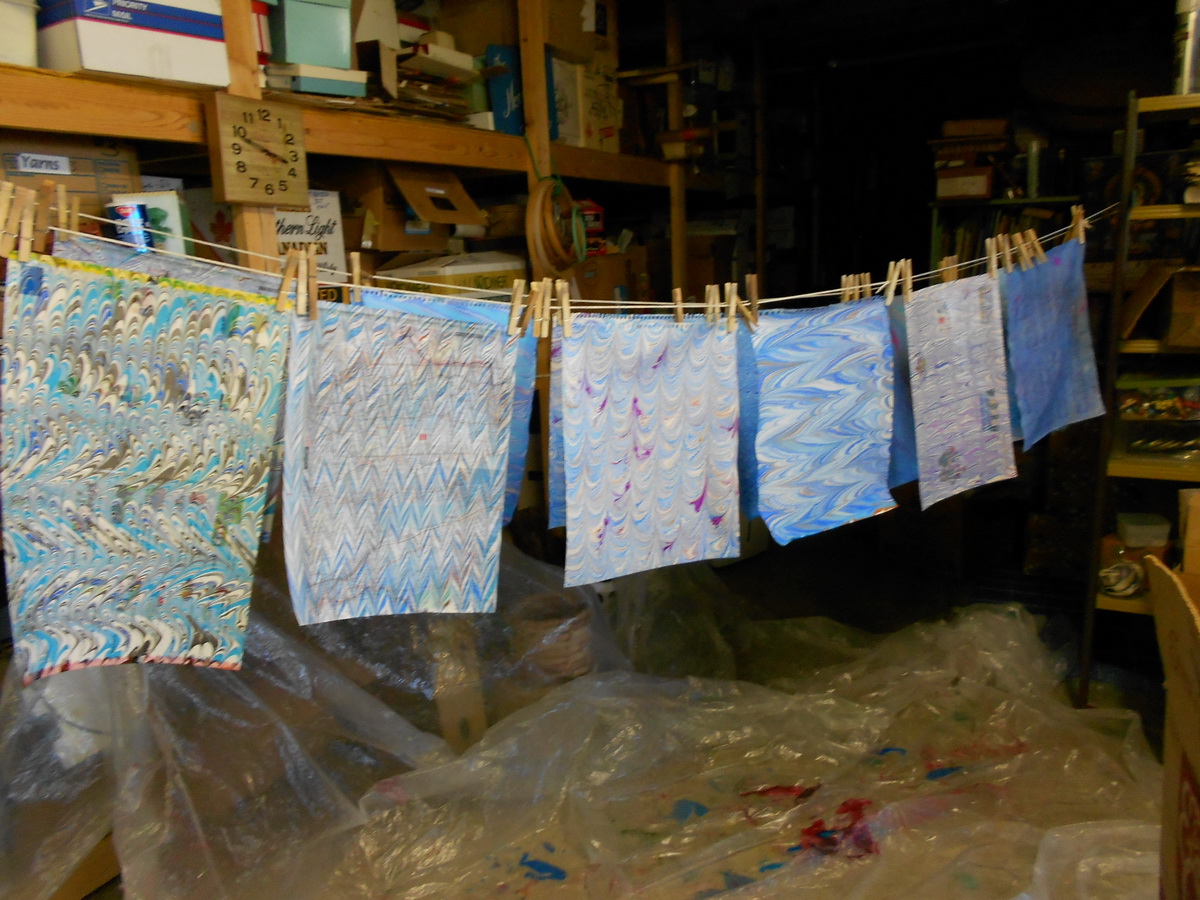
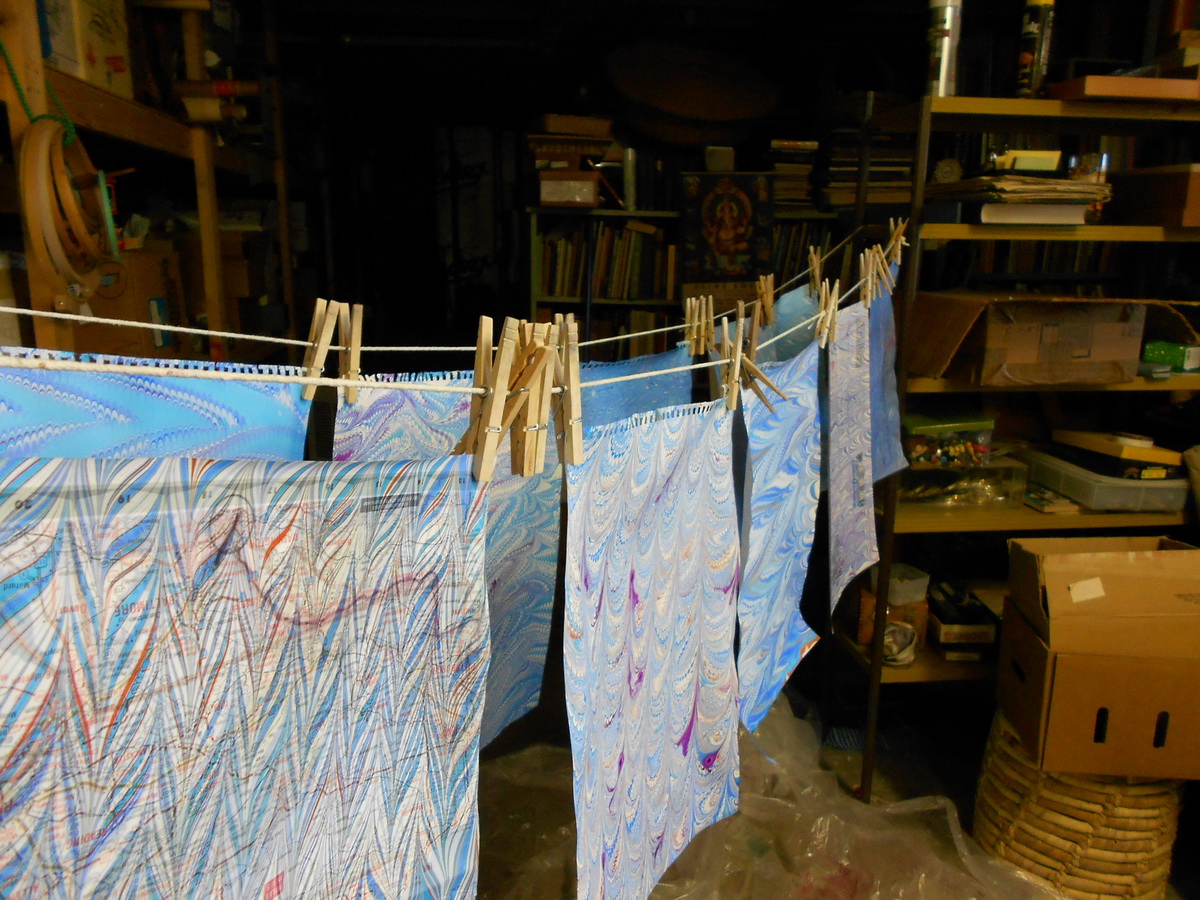
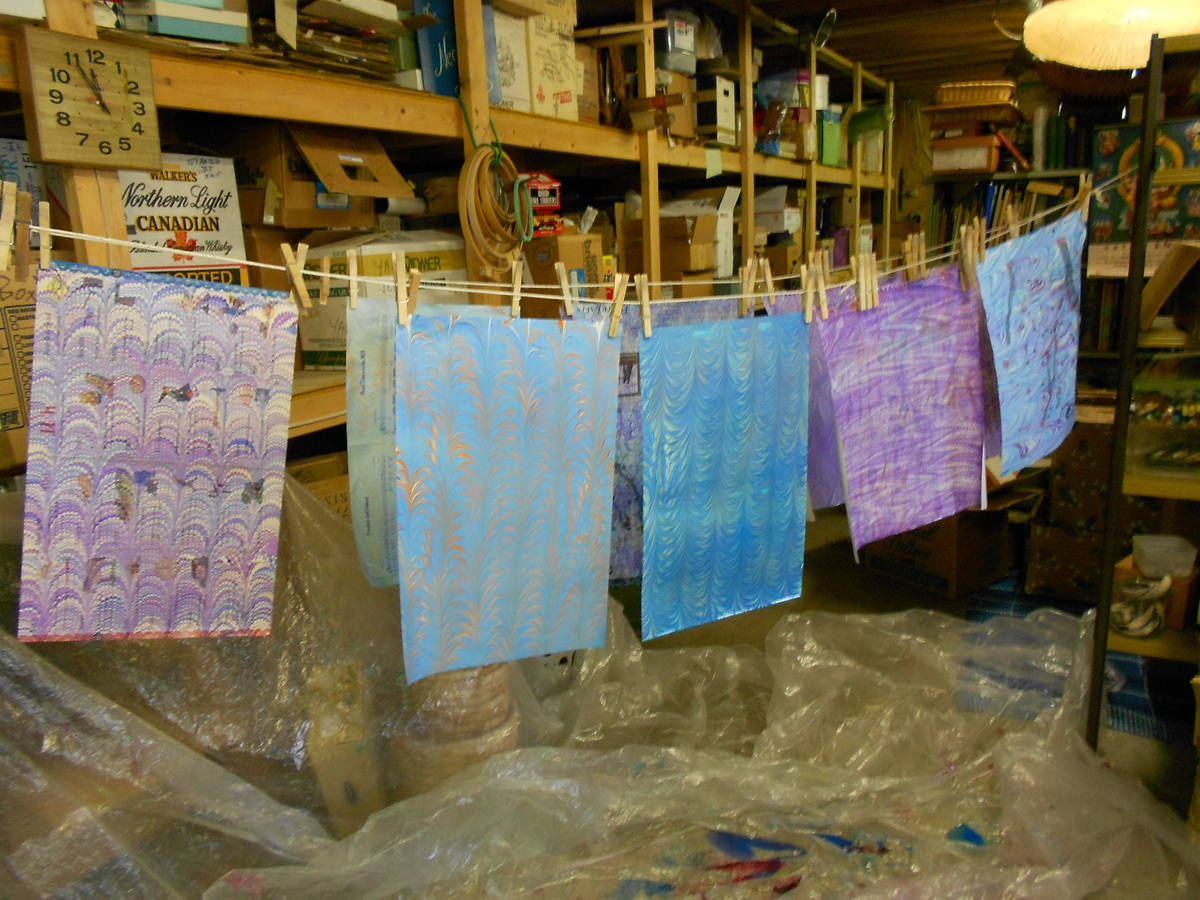
- Marbled papers hanging to dry
-
- Marbled papers hanging to dry
-
- Marbled papers hanging to dry
-
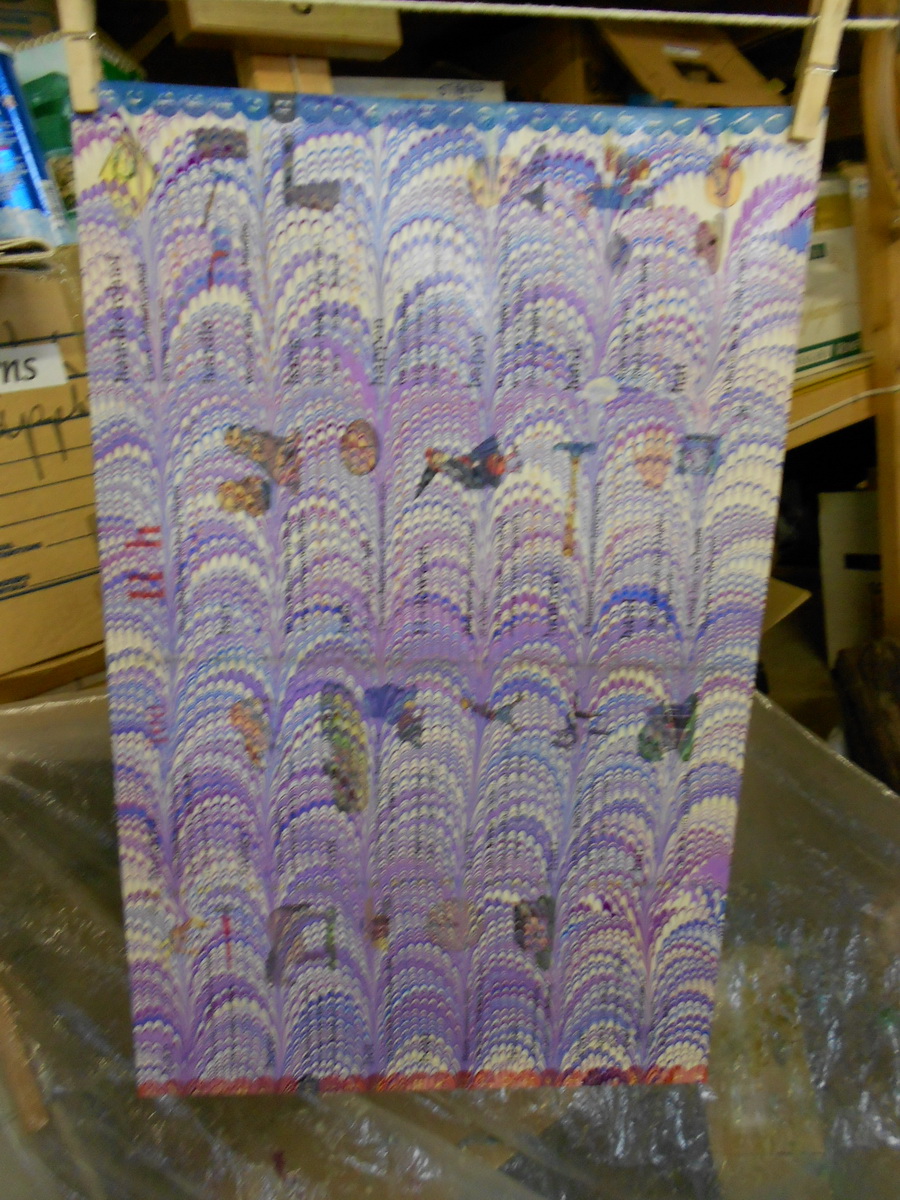
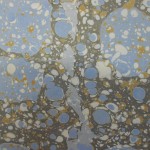
- Vintage marbled paper from children’s book
-
- Marbled paper hanging to dry
-
- Marbled paper hanging to dry
-

- Marbled paper hanging to dry
-
- Marbled paper hanging to dry
-
- Stone pattern on paper
Added January 2015
I’ve found some photos that were taken last year by a student in my marbling class which show some of the processes that I couldn’t photograph while I was working.
-
- Using newspaper strip to clean carrageenan
-
- Combing
-
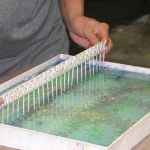
- Combing get gel
-
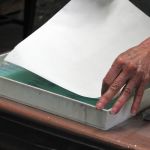
- Laying down paper to “print”
-
- Washing paper, marbled side down
-

- Hanging paper
The combs and rakes are home made from corner bead (from the hardware store) and pins for hair rollers from a beauty supply house. Invented by Pat Thomas and directions are on her blog.
There are many more posts about how I marble in my blog. You can find them all by clicking on “Marbling” or “Marbled Paper” in the list on the right-hand side.
Here are links to some of them:
Identifying Problems
New Paint
Metallic Paints More on Metallics
Marbling Workshop
Overmarbling More
What ratio of paint to water do you use the dilute the golden fluid acrylics? Do you add anything else to the mixture so they don’t spread too much?
Sue,
I don’t measure the water or the paint, but go more just by “feel”. I would estimate that it’s about 1/3 water to 2/3 paint or a bit more. Somewhere between chicken broth and tomato soup! The first few sheets of the session are used to balance the paints so that they spread at about the same strength. If one color is too thick, I’ll add a bit of water or just one drop of Golden’s Acrylic Flow Release. It is much easier to make paint spread more than it is to make it spread less, so I start very conservatively. Yellows and reds spread more than other colors and I sometimes start with them full strength and only add water as needed.
Good luck with your marbling. It’s great fun!
Nancy
Thank you for responding. That helps a lot. What papers do you use?
As for paper, I’ve tried most everything! I’ve settled on Strathmore or Canson drawing weight paper as my standard for most bookbinding uses. I also marble a lot of card stock for cards and some folded crafts. I love marbling vintage or antique papers, but I have to be very careful with those as they can be too fragile to hang to dry. I usually have some towels laid over a flat surface so that if I run into a fragile paper, I can dry it flat instead of hanging it. I also love marbling road maps. Many people recommend textoprint for marbling, but don’t care for it. The only paper I’ve learned to avoid is anything glossy, like magazine pages or slick brochures.
One thing I’ve learned is that paper that is very slightly acidic seems to marble better than acid-free, but it’s almost impossible to find in quality papers.
It really depends on what you want to do with the paper afterwards. I have some wonderful sheets that are super heavy that I just can’t find a use for. I wish I had used a lighter weight paper. My advice would be just to try everything and see what suits you best.
Nancy
Oh, envelopes and writing paper are fun. Just keep the gummed flap out of the water!
Thank you for your helpful instructions, I have Carrageen Moss from Donegal Ireland, I’ve boiled it and filtered it but don’t know how set the jelly should be have about 2 litres of this jelly and could boil up more moss to stiffen it if need be, You have made very beautiful papers, my son lives in Seattle Wa. and will come to England in April he would bring me some of your paper, are you near Seattle?
Barbara Shaw
Barbara,
I’m afraid I can’t help you much with the carrageenan! I’ve only used it already processed in powdered form. I use 5 tablespoons to 2 gallons (US) of water to reconstitute it. It sounds like what you have is too thick. It needs to be quite liquid, easy to pour, with a slightly slimy feel. If you’ve ever made wallpaper size, it’s about that consistency, like a very thin gruel, but not quite consomme! I think it is great that you’ve made your own. You might try putting a small amount in a saucer and placing just one drop of paint on it. If the paint floats and spreads, you’ve got it right. Just keep adding water until it works.
I live on the East Coast, about 6 hours from New York City and 4 hours from Toronto, no where near your son. If you want to purchase my papers, I can mail them to him easily.
Thanks so much for reading here and let me know how your carrageenan works out.
Nancy
Whoops! I reversed my numbers on the carrageenan. It’s 5 tablespoons to 2 gallons of water. I corrected it in the text.
Nancy
That all looks great, thank you for posting this!
I was wondering if I could I ask for some advice please?
I want to start marbling and I’m experimenting now, but whenever I remove the paper from the painted size the paints sort of smear and and ooze off…
I use alum for the paper, I mix carrageenan for the size and I use acrylics mixed with water and marbling gal, so I’m not sure what I’m doing wrong?
The size I mix is quite thick but if I use less carrageenan the paint sinks…
Sonia,
Thanks for stopping by. Paint not adhering to the paper is usually an alum problem. What is your proportion on the alum? I use 1 to 2 teaspoons per cup. However, because you are also having problems with the paint sinking, I’m thinking it might be the paint. What brand and weight are you using? When I first started marbling, I bought some heavy-body acrylics because they were on sale. Total waste of money! They are just too heavy no matter how much water you add. I use Golden Fluid Acrylics now and they are wonderful. You don’t need gall with acrylics, only if you use watercolors. I don’t know if that might be your problem or if it doesn’t make any difference. I don’t have much experience with gall. I use Golden Acrylic Flow Release when I need extra help in spreading paint.
Carrageenan mixed at 2 to 2.5 Tablespoons per gallon should give you a good consistency for your size.
What happens when you rinse your paper? Does all the paint wash off or just some? Do you rinse under a faucet or use a bath? I prefer a bath as it is gentler, especially on vintage papers. If you can post a picture of what your paper looks like as it comes from your marbling tray, I might be able to help more.
In my latest blog, I’ve been trying to show common problems and their causes. There are so many factors in marbling that it is sometimes hard to see what is going wrong.
Good luck!
Nancy
hi I just found this site and I just started marbling this year. I have been using the texoprint with no problem. But the past two times I have tried marbling the paint is not sticking to the paper very well. I am using some older alum that I used to use for yarn. Could it be that my alum is just too old and I need to get a new batch? I would love to try a gentle water bath but right now if I tried that all the paint would come off. I am using a mister. If I get the new alum do you think I could have success with the bath method?
Betty,
Glad you found me! Nice to know that people are reading my jottings. I don’t know a lot about yarn mordants, but I know you can use many different types to acquire different colors – tin, copper, iron etc. Aluminum sulfate is necessary for marbling and most experts recommend using only alum that is made specifically for marbling. Yes, it can get old and if the paint is sliding off the paper it is definitely a problem with the alum, not the paint or paper. I use a slightly stronger mixture than usually suggested – 1 1/2 tsp. per cup and it works for me. How are you applying the alum? With a sponge or a mister?
Marbled paper should be rinsed to remove excess paint, carrageenan and any contamination. I don’t think just misting the paper after marbling would be very effective in this process. How do you dry your sheets, by hanging or lying flat? Can you hang your sheets without the paint moving? Sorry for all the questions.
I would advise that you get some alum that is designated for marbling. First do a trial paper and just hang it directly from the carrageenan. If the paint doesn’t move, on the next sheet try using the bath to rinse and hang it. The rinse water will change color if you have used more paint than the paper can absorb, but that’s normal.
Good luck with your marbling.
Nancy
hi Nancy
love you article thanks
I amin Costa Rica I understand that carageena does not work on hot days how hot is that?
thanks
lil
Thank you for reading my blog. In my experience when the temperature is above 80* F, the carageenan seems to break down more quickly. You can still marble on it for a day or two. If you can store it in a cool place overnight, that will help extend the life. In summer, I sometimes put half of the carageenan in the refrigerator until I’m ready to use it. In the winter, it just stays in the studio, under my table.
Nancy
Pingback: Update on “How to Marble Paper” page | Losing Her Marbles
I’ve been trying to do marbling but am struggling with the thickness. I’m using gouache paints, to which how much water and oxtail to mix in I have no idea. Also, you said 2-2.5 tablespoons per gallon would work, which is a bit vague… Could you please help me?
Nicholas,
Thanks for visiting my blog. I’d like to help, but you have confused me! I’m not sure if the thickness problem is with the paint or the sizing. The 2.5 TBS per gallon is for the carrageenan, not the paints. What are you using in your tray as the size to float the paints? Carrageenan or methyl cellulose are the two recommended media.
I use acrylic paint (Golden Fluid Acrylics), not watercolors. Gouache may be just to heavy and thick to float well. For regular watercolors or acrylic paints, you can start with 75% paint – 25% water. If that doesn’t float, add water, just a drop or two at a time until you get the right balance. On this page you can see photos of my paints that may help you see their consistency.
Good luck with your marbling and ask again if you are still having problems.
Nancy
Hi there, thank you for this helpful blog post! I was wondering what size tray you use for the paper marbling process and where can I purchase one (like that clear acrylic one in your picture above)? Did you have yours custom made? I can’t seem to find one anywhere that is large enough for marbling paper…
Alisa,
Thanks for you kind words about my blog. I started it just to keep track of what I was doing, but I’m glad I’ve been able to help some people.
When I first started marbling, I also hunted everywhere for an inexpensive tray, but then I took a class that used these. They are really clear acrylic frames! Michael’s and other craft places carry them in a number of different sizes. I use a 16″x 20″ for most of my marbling, but they make larger ones – I think 18″ x 24″. Michael’s doesn’t list them online, but most of their stores carry them. The brand I have is Studio Decor Basic, but there are others. Be sure to test that it holds water before using! A little sealant, caulk or super glue in the corner will fix any leaks.
I can’t figure out how to add a photo to this message, so I’ve added some to this blog under “Tools”. I didn’t realize that I never finished that section. Will have to get back to it.
Have fun marbling and please ask if there’s anything else.
Nancy
Pingback: Marbling #2 – Turkish/Ebru marbling -Size and Mordant – The Celestial Journalers
Hi there! I’m trying to do marbling paper but I can’t find carrageenan in any place of Manchester. I’d like to know if can I use another kind of gelatine?
Thank you so much
Thanks for checking out my blog.
You can also use methyl cellulose, but it doesn’t work as well. Easiest thing to do is order it online. You can find it on eBay, Etsy, maybe on Amazon and from bookbinding supply houses like Talas.( talasonline.com ) There’s a place in Israel that sells it both on Etsy & eBay that’s very reliable. Sorry, I can’t think of the name right now. Just Google “Marbling carrageenan”, but be sure to get the kind that’s produced for marbling, NOT the food additive.
Good luck and happy marbling!
Nancy
Hi Nancy,
Great blog, you make some really lovely stuff!
A question about reds. I also use Golden fluids as they have such good pigment loads, but I am having some issues with my red, namely Quinacridone Crimson. I love the colour but when I use it, it seems to just run off the paper leaving a faded look. All the other paints work fine, so have I just got the ratio wrong (ie too much water) or is it something to do with the pigment in the paint itself?
Kind regards
Jess
Jess,
Thanks for the compliment. I haven’t done any writing in a while, but I do try to keep up with any comments.
I’ve never used Q. Crimson so don’t have direct knowledge. I have used and love Q. violet, but I tend to stick with alizarin crimson for my red.
There are a couple of things that might be causing the problem that I can think of. Is the paint really washing off the paper? Is the rinse water turning red? If so, then it might be a mordant problem. I assume you are using marbling alum. I’ve found that very occasionally, one specific color doesn’t “take” with the alum. For some reason the chemical bond isn’t formed with the paper. I don’t have enough background in chemistry to explain it, but it seems that is what is happening. I had that happen with Mars Black and nothing I did could fix it.
If the paint is just turning pink when it dries and is not staining the wash water, then it is probably a question of too much water added to the paint. Reds and Yellows need very little thinning. In fact, I usually start with them at full strength and only add water if they aren’t spreading.
You can try making a series of test strips with different strengths of alum. The first with 1 tsp. per cup. 2nd with 2 tsp. per cup and so on. Don’t forget to mark the strips with the strength! Then just dropping the crimson, put all the strips on the same tray and see what happens. To test if it is the amount of water, mix tiny amounts of paint with differing amounts of water. In a small tray with small sheets of paper, sample each strength separately using only the crimson. Again don’t forget to label each sheet with the strength so you can compare results. Be sure to play with the patterns on these mini tests. Marbling with only one color can give some interesting results.
If all that seems too bothersome, just switch the Q. crimson for another red!
Good luck and let me know if any of these experiments work. I’m sure that other marblers may have had similar problems.
Nancy
Thanks for your thoughts Nancy. It seems that a stronger concentration of alum was needed to help fix the red. It still isn’t quite as strong as I’d like on the paper so I will experiment with alizarin crimson as well as trying the Q. Crimson in varying concentrations.
I’m pretty new to marbling so it’s all part of the learning experience! It is addictive fun though!
You are right. It is definitely addictive!
Two hints to remember: the first color dropped will always be the most intense, so if you want strong black or red lines, drop them first. Second the intensity of all the colors depends more on the amount of total paint floating on the carrageenan, than on the intensity of the individual colors. This means that 4 drops of an intense red will always look pink, 40 or 400 drops will be red.
To see many shades of a specific color, try doing what I call minimalist marbling. Drop the color, then white, then the color again and repeat several times until you have a full tray. See Minimalist
Have fun!
Nancy
You have the best directions and information I have seen anywhere …thank you so much…. I am enjoying marbling but there are certain things that I do forget from time to time
Thank you! I started this blog just for myself and to help me remember what works and what doesn’t. It’s been a learning experience for me.
Nancy
Thank you for you blog. I have just stumbled on it as I am just doing the research and trying to learn all I can about paper marbling. You have answered so many of my questions in one shot that I am ecstatic!
Tried to get to your friends site to learn about how you to make some combs, and the site was no longer there. Would you have someplace that may direct me in the right direction?
Sincerely seeking,
Joe
Joe,
Glad you found my blog useful.
I’m sorry that Pat has removed her blog. I sent people there all the time for her instructions on how to make combs/rakes. Here is her FaceBook page. https://www.facebook.com/SeenMyMarbles/ You might send her a message asking about them.
The combs are made from the plastic corner bead used on drywall, available at most hardware stores. The cheapest kind is the best as you have to bend one edge in. The points are made by sticking hair roller pins (available at Sally’s Beauty supply) through the top and bottom holes on one side of the corner bead. The bead can be cut to the length or width of your trays. The bead can be tough to cut, strong scissors or tin snips are needed. Combs can be made with the pins in every row of holes or with any distance between that you want.
I’ll try to post a few quick photos on this page since I can’t seem to insert them here.
Nancy
PS. I added the photos under “tools” in the beginning of the post.
Thanks so much for this! I’ve been trying to marble and keep having problems and google just hasn’t been helpful. I’ve tried the Jaquard marbling paints and the golden fluids. With both some colors don’t spread evenly and just look like specs of color, like flakes. Once i did one drop of purple and it started nicely, but then one side started flaking and the other side was fine… White, black, yellow, blue, not the same ones at the same time. I thought it was the jaquard paints at first, but the golden fluids are doing it too. Also, I had another weird problem today. I would put my first layer down and everything spread great, then I’d put another layer down and it would sink. If i then used that second color first it spread great and then the first color from before would sink and a third color would be ok! So for example, I put black first, spread beautifully. Second color was blue, it sank. Third was yellow it spread. So I took that off and then I put blue down first and it spread beautifully, then yellow and it sank…. any ideas? At this time my yellow was also doing that flaking thing when it spread.
Mary,
Thanks for stopping by my blog. I hope I can help. Let’s eliminate the easy part first. I’m assuming you are using carrageenan for your size and that you skim carefully between each application of paint. Contamination of the size can be a major cause of problems. That is a common cause of flaking. Another cause can be that the paints are not in even suspension and need to be thoroughly stirred. This is very common with Ultramarines and metallics.
Paynes’ gray and black also tend to need more stirring. This is one reason I don’t like using bottles to drop my colors. I use small cups so I can stir and check to see if the paint is settling into a sludge on the bottom of the cup.
Paint laid down on the size drops out when it is too thick/heavy for the size to support its weight. It happens if you put too much paint on the size or if the paint hasn’t been thinned to the correct consistency. It’s not unusual for the 5th, 6th or 7th color laid down to start to drop out, no matter the order of the particular colors. It’s like putting weights on a balance scale, you can put them on in any order, but when the total reaches a certain weight, the balance will move. With your problem, the size seems to be able to carry only one paint. I suspect that the paint hasn’t been thinned enough. Even Golden’s Fluid Acrylics need to be thinned by 1/3 to 1/2. Alternatively, the size may be too thin, but that’s a less common problem.
As an experiment, use a small tray for the size and use two colors that have been stable for you (don’t use red or yellow) and drop one drop at full strength, mix a few drops of water with the paint and drop again, mix a few more drops, drop the paint and continue. This is just to watch what happens as the paint becomes thinner. The more water is added, the more the paint should spread. At some point, the size won’t be able to hold more paint and the paint will stop spreading and begin to drop out.
Good luck and let me know how your experiment works out. Marbling is really an exercise in balance.
Nancy
Hi!!
Thank for all of this detailed information. I used to marble with utrech acrylics, but now I’m going for Golden fluid. However I realized that my blues, and purples turned out quite dull and not opaque enough. Any suggestions? I’m using Cobalt blue, diozaxine purple, cobalt turquois and ultramarine violet.
Thanks in advance!
Roxana,
Thanks for stopping by my blog.
As far as the colors go, there are two factors to consider: first is the paint itself and second is your marbling technique.
Some of the Golden colors are transparent, not opaque, and you have to be careful about those. I did a quick check and the only one I saw was the ultra. violet which they call “moderately transparent”. Here’s the best information on individual colors https://www.goldenpaints.com/products/colors/fluid I have to remind myself that these colors are developed for painters and marbling is secondary to them! I’ve also found that certain colors just don’t work well for me, but I tend to forget which ones! I think the Cobalt blue was one of the “baddies”. I usually have half a dozen blues on the table and just grab without checking the name of the color.
The second possibility is that you are diluting the paint too much in your initial mixing. All paints need some water added to be the correct density for marbling, but I have found that the amount to be added varies by color. The way to check this is tedious, but useful in the long run. With a very small tray (you don’t want to waste too much carrageenan, paint or time) start with a color at almost full strength drop just that color multiple times and print. Add a measured amount of water, five or ten drops, or whatever seems right to you and repeat. Keep doing this until you think you have the color you want. BE SURE to mark the papers 1,2,3 etc. and keep notes on number of drops etc. If they are all too pale and wimpy, you may simply be dropping too little color. The intensity of your colors depends on the total amount of paint on your size. If you’ve done a bit of marbling, I’m sure you’ve seen red turn to pink. That’s just because the red has been able to spread over a large area and thinned out. It’s also why the first color you drop is always the most intense. It has been pushed together by all the following colors.
Hope this helps some, if not let me know.
Nancy
Hi!
Thank you for a very informative site. I’m in the uk and have ordered after much toing and froing on Google Iota Carrageenan. You mention it shouldn’t be food grade but I have searched high and low and have not seen non food grade anywhere. Is this going to affect my marbling?
Also I am in a hard water area so have purchased spring water to mix. Can you help please? Do I still mix the same ratio of carrageenan to water and how long will it last?
Thanks!
Sue,
Thanks for reading my blog.
I’m not sure I can give you more help with your carrageenan. I’m not a chemist and have never gotten into the lambda vs. iota discussion. My understanding is that most carrageenan that you can buy is food grade, including that used for marbling, so that shouldn’t be a problem. I always buy carrageenan that is labelled specifically for marbling. Of the hundreds of batches of carrageenan that I’ve made, I’ve only run into problems a couple of times, so I suspect it was something I did, like mis-measurement or contamination, rather than the carrageenan itself.
Correctly made carrageenan should last three to five days and may go as long as seven, especially in cool weather. In really hot weather, 90*F and above, it will break down faster.
One caution, spring water may contain minerals so I prefer distilled water. In the US, even the generic bottlers make gallons of distilled water at the same price as their regular water. Try the spring water, though, it should be fine.
Good luck with your marbling!
Nancy
I’ve never marbled with gouache, only acrylics. Since gouache is a water color paint is it still water soluble on the finished sheet? Is there something I need to add to the paint to act as a binder?
Sorry, I can’t be much help. I also usually use acrylics. I did take a class once where we used watercolor and some of the colors rubbed off more than others, as I remember. I think you can rub slightly warm wax over the paper to seal the color.
Good luck,
Nancy
Is there anywhere I can get drywall corner bead in a single 8′ length to make a couple of rakes? Looking online, it all seems to be sold in packs of 50, for $100-200, which is certainly more than I need. Do you have to know someone who is doing construction who could bring a single one home for you?
Try Lowe’s, Home Depot or your local hardware store. It’s very cheap – under $5 for an 8′ length. They sell it by the piece and in all lengths. There are a variety of types so it’s nice to feel it in person. You want the flimsiest (and cheapest) because you need to bend the flaps to anchor the pins.
Good luck,
Nancy
We are just starting to discover the joys of marbling. In our case we are probably going to focus on silk scarves. Our problem is the cattsgeensn. It is confusing when the package of Jacquard carrageenan says 4 teaspoons per gallon of water, while that from Dharma trading says 4 tablespoons per gallon of water. You are suggesting 2- 1/2 tablespoons per gallon of water. MarbleArt says 2 TB plus 2 tsp per gallon. Are different brands of carrageenan different? Which is correct? Which brand do you use?
I’ve used several carrageenan from a bunch of different sources, including Dharma and MarbleArt. I’ve always gotten good results from the 2.5 TBS/gallon. If you are concerned, try making a very small batch, just a cup or a pint, and see what the result is. Put it in a small bowl and see if your paint floats and spreads properly. In marbling there’s a lot of trial and error until you can balance your carrageenan to your paints to get the results you want.
Good luck and have fun,
Nancy
Hi Nancy, I’m new to paper marbling and I just wanted to let you know how helpful your instructions were in getting started. Thank you SO much for writing this all out and sharing! I’m using Golden fluid acrylics and they’re great so far, even though some colours seem to spread a lot easier than others. Still experimenting and working that out. I also made my own combs by painstakingly shoving sewing pins into a thin strip of wood, but your way seems a lot better 😉
I’m so glad you found it useful. Yes, the colors do spread at different rates and sometimes, it seems, by whim! That’s part of the challenge and fun.
Nancy
I am slightly confused with which Carrageenan can be used for silk marbling. It says on Amazon that Kappa is recommended but when I look into it it gives lots of ideas for using with food. Is that ok or should I go for Iota or Karagen please. Many thanks. Wendy
Frankly, I’m not a chemist and I don’t understand the chemistry of it, but Lambda Carrageenan is the one generally recommended for marbling. I usually buy from a source, like Dharma Trading or Marble Art that supplies only to marblers so they don’t carry the type that’s used in food. That way there’s less confusion.
Nancy
Thank you so much for sharing your information! I’m a bookbinder and I’m about to start creating my own endpapers, so diving in to the marbling world. My question is about paper. Do you have a good source for paper other than a craft store, like Michael’s or Hobby Lobby? I”d like ot buy paper that is at least 18″ x 24″, so that I can get 2 matching endpapers from each tray. Paying over $1-2 dollars a sheet from Talos, etc., gets really expensive. I want paper that will last for many years, my books are leather bound, so they’re meant to last decades. I’m just a bit scared of using paper that may degrade quickly. Thank you so much!!
Sorry, but I forgot to ask an important question regarding paper suitable for End Papers. What weight do you suggest? I saw that you do not prefer Texoprint, as this paper does not glue down well. 80#, which is much like cardstock weight, is what I see that you suggest for general use, do you use this for your end papers? I have purchased, in the past, Italian hand-marbled papers and these are a good weight, but I have no idea what they used. Thank you!!!
Thanks for reading my blog. Glad it was helpful.
I like using Strathmore or Canson drawing weight papers for both my textblock and endpapers. The endpapers are a little heavier than in printed books, but this weight is lovely for writing or drawing and they don’t bleed through when printed. Don’t try to use lbs. as the weight measurement as it varies with the size of the paper. The gsm is a much better system as it is grams per square meter and is the same for all size papers. I suggest weights from 110 to 130 gsm for most endpapers, but you should experiment a bit to find what works best with your textblocks. I like Dick Blick or Jerry’s Artarama for decent prices on both tablets and sheets. One warning on buying sheets is they are often tagged for individual sale and the tags can leave an adhesive residue which must be removed before marbling. Mohawk Paper also has a nice line of quality papers if you want to buy directly from the manufacturer. I’ve used their Superfine 18t (118gsm) successfully. Any good quality, acid and lignen free, paper should last for at least 100 yrs. as long as the book is kept with reasonable care and not eaten by the dog!
To get a bit in the weeds, be sure to watch the grain direction of your paper. Endpapers usually run with the grain parallel to the spine of the book, but they can run cross-grain and not affect the structure. Textblocks will fail if the paper doesn’t have the grain running parallel to the spine. When marbling, the pattern should run in the same direction as the grain of the paper. It’s a good idea to plot out the size of the endpapers, the direction of the grain and the pattern before starting to marble. Sometimes I wind up with the perfect color and pattern, but the size/shape of the paper means I can only use it cross-grain.
My advice is to try out a bunch of different papers in various weights and finishes and see which feels best with your style of marbling and binding. Everyone has different preferences – light vs. heavy, smooth vs. textured. See which pleases you and go for it.
Above all, have fun!
Nancy
Thank you so much, Nancy!! I really appreciate your reply. Super helpful and I’ll check out your recommendations.
You are quite welcome.
Happy Marbling!
Nancy
HELP!
I am a professional artist but a group that I teach wants to attempt marbling.
It seems fascinating and I am sure will be great fun.
3 initial questions: 1 How long does the finished marbled paper take to dry?
2 Does the Alum coated paper have to be dry or slightly
damp before marbling?
3 is there a time gap between marbling and ‘washing’
the finished paper?
Many Thanks, Dorothea
Dorothea,
Thanks for dropping by. I’ll try to answer your questions.
1. Drying time depends a lot on the humidity of the drying area. I usually just let my papers dry overnight. If you try to stack papers that are not thoroughly dry, they will stick together. If this happens, don’t try to pull them apart. Immerse them in water and wait until they float apart on their own. A hairdryer can speed up drying time, but don’t use on paper that is visibly wet as the paint may smear.
2. Alum – there are two schools of thought some people like paper that is alumed the night before and totally dry. I prefer paper that is slightly damp – just cool to the touch, not wet. It takes about 20 min. from time alum is applied. Be sure to keep the paper under a light weight to prevent curling while drying. When I’m marbling, the first thing I do is alum the paper, weight it down and then prepare my paints and workspace, by the time I’m ready with the paints, the paper is ready.
3. Again, different people do this differently, I use a tray to wash and the paper goes directly from my marbling tray into the wash tray. Some will place the paper on a support board and let it sit for a while, before running water over the paper. I find that process awkward and difficult to control.
Best of luck with your class.
Nancy
Thank you so much for your blog, it’s so kind of you to share all your experience and it’s extremely helpful. I’m starting the marbling journey so I’m grateful for all the information I can get.
So Thankful to find you again.. I have had joyful marbling success for several years now …great stress reliever… allows me to create and share marbled products with friends and family and even strangers… The activity of marbling is an eye catching, smile producing way to make new friends ..BUT the Last 3 times have been horrible. ALL the paint sinks except for one shade of equally thinned grass green…all paints same brand, kind, same age.
Everything is always done as I have always done it ..I have been through my check list.
size was left to sit 24 hours in studio uncapped gallon jug.
I blended 2 Tablespoon even fill +1/2 of another Tablespoon with one gallon of warm water.. Paints appropriately thinned. ..Is it possible stored Carrageenan can loose potency over time?
I did read in earlier email that Kappa Carrageenan is not the form to use for Marbling and that is what I have been using all this time with wonderful success until the last 3 attempts. Why did it work for so long and not now? and maybe that is not the problem?
I will purchase Lambda first thing tomarrow.. would appreciate any input.
Conda Prell Puckett
Hello, I’d like to have some advice. When I print the design onto the paper and I lift it, the colors slide off without sticking to the paper. What can it depend on? Thanks so much
Hi Simona,
Glad you’ve taken up marbling. It can be a lot of fun.
For the paint to adhere to paper a mordant must be applied to the paper. Alum is the mordant that is used for marbling. It’s best to buy the alum sold specifically made for marbling rather than the alum you find in grocery stores which has other substances added to it.
You can buy alum from Talas, Dharma Trading Co. or other sources of art or craft supplies. Mix 1 teaspoon to 1 cup water, sponge the mixture onto your paper and let dry under weight. Be sure to mark the paper so you can see which side is alumed. If you check my blog on troubleshooting, you can see pieces that I tried to marbled the wrong (unalumed) side and all the paint slid of.
Good luck,
Nancy
I can’t figure out how to post
Ideas. Thanks Cynthia
Cynthia,
All posts have to be approved before they show up on the public site. I no longer monitor it every day, but I usually get to it at least once a week.
Nancy
Thank you very much! I have another problem: the colors on the surface fall apart, I do not know how to say, they separate as if they were scales. it looks like a mosaic within every single spot of color. what can it depend on?
Hello Nancy
Thanks for great marbling information!
I sent message few days ago, but I don’t think it went through
So, this is a test
Thanks Cynthia
Cynthia,
I replied to your comment yesterday. It showed up on the “Welcome” page instead of here. You should have also received an email.
Nancy
One of the best articles I’ve found! Using acrylic picture frames is genius, as is using dowels to stir.
I’m struggling to balance colors. I’m using Liquitex Soft Body, but will be switching to Golden Fluid as I finish up the Liquitex I have. I’m also using Kappa carageenan (labeled “For Marbling” by this particular supplier) but have ordered Lambda from Dharma.
Here’s my question: If a paint is too pushy — like reds tend to be — how to you take it down a notch and make it play more nicely? And for shy colors — like most blues — how to you get them to stand up to the pushier colors? Is it all about the ratio of paint to water? No need for gall? Just a drop of Flow Release when absolutely necessary? I know you probably explain all that in the article, but I get very confused on this topic and could use a little help.
Thanks –
Thanks for reading my very old post. Haven’t updated anything in a long time.
You have the balancing of color absolutely correct. Start with straight color (no water) for the pushy I like that term colors and test them, adding just a drop of water at a time until they float and expand to a nice size – I liked a generous fist size. It’s really hard to make a color less pushy. If you’ve already added water you can try adding more pigment, but if you are using it straight from the tube, there’s not much you can do. Using several pushy colors together can work – like dropping a yellow on a red, then maybe another shade of red or orange and then white. It’ll give a very vibrant palette, but that’s OK.
The shy colors can be mixed with water right away. Some people use exact measurements, but I always just put a dollop of paint with a splash of water! If the color sinks or seems to contract quickly, just add a drop more water and check again. I usually didn’t add Flow Release until I was actually marbling. If my red was just overwhelming my blue, I’d put a drop of the FR into the blue.
Some times I’d put a piece of newspaper over most of the carrageenan, leaving a small “testing” area to play with the colors so I didn’t waste a full tray and good paper on colors that were misbehaving.
As you’ve found out reds and yellows are pushy. Blues and purples are shy. But there are differences among the types of color – alizarine crimson and red oxide do not have the same ‘pushiness’. The only way to know what works for you is to keep playing. It really helps to be a bit anal and make notes about which colors give which results.
Blacks can be tricky. I liked to drop them first so they get pushed into fine lines. Whites and neutrals can get a bit pushy, so add water sparingly.
The frames as trays wasn’t original with me. Only caveat is be sure to test their water-holding ability. If they leak, you can use a bit of aquarium sealant, caulk, goop, or something similar to fix the leak. If you don’t use them for a long time, it doesn’t hurt to check them again before adding your precious carrageenan!
BTW I started with Liquitex also and once I started with Golden, I never went back. After 6 months or more of the Liquitex sitting on a shelf, I donated them to the local art center.
Good luck and Happy Marbling,
Nancy
Golden Fluid Acrylics straight from the bottle?
Yes, especially for the reds and yellows. add water as needed. Most other colors you’ll want to mix with water right away. Colors that drop out and leave a ball on the bottom of your test tray need more water.